Make a Pet Portrait SVG From a Photo Without Photoshop
Turn a photo of your pet into a cut-ready SVG portrait: pick the right photo, remove the background free, and trace clean layers, no Photoshop needed.
On this page
- Why the first attempt usually fails
- Step 1: choose the photo like a designer
- Step 2: remove the background for free
- Step 3: pick your style rung
- Step 4: trace it into clean layers
- Step 5: think like a weeder before you cut
- What this looks like with PerfectVector
- When buying the portrait is the better move
- Before you cut
- FAQ
- Sources
You can turn a photo of your pet into a cut-ready SVG portrait with free tools and no Photoshop. The workflow is: pick a photo with good contrast, remove the background, decide how many layers your portrait needs, then trace it into clean vector shapes and tidy the colors. How long cleanup takes depends on the photo and the level of detail.
Here's the part that saves you an evening of frustration: when a pet photo comes out of a converter as a blobby, jagged mess, the converter usually isn't the main problem. The photo is. Converters trace exactly what they're given, and a dim living-room shot of a dark dog on a dark couch gives them nothing to work with. Prep the photo first and the same converter produces something you'd actually cut.
The quick version
- The photo decides everything. Sharp focus, strong light, and contrast between pet and background.
- Remove the background first, with your phone's subject lift or a free web remover. Never trace the couch.
- Pick a style rung honestly: silhouette (1 layer, most forgiving), stylized portrait (2 to 4 layers, needs a good photo), hand-drawn line art (that's commission territory).
- Merge similar colors after tracing so fur becomes a few clean layers instead of forty specks.
- Check it at cut size before cutting: whiskers that look fine on screen weed terribly at 5 inches.
Why the first attempt usually fails
The typical story: someone feeds a favorite pet photo straight into a free converter and gets back either a posterized blur or a spray of disconnected specks. Then they try another converter and get a different flavor of the same mess. Two things are going wrong, and neither is fixed by switching tools.
First, the background is being traced along with the pet, so the couch, the grass, and the shadow all become shapes. Second, a photo is the hardest thing you can ask a converter to trace: thousands of soft color transitions with no hard edges. A pet portrait works precisely because you reduce the photo before tracing: one subject, no background, and a deliberate, small number of colors.
Step 1: choose the photo like a designer
Ten seconds of photo choice beats an hour of cleanup. Look for:
- Contrast between pet and background. Dark dog, light background; light cat, dark background. The remover and the tracer both live off this edge.
- One strong light source. Window light or daylight, slightly from the side, gives the face structure. Flat indoor lighting erases it.
- Sharp focus on the face. Zoom in: if the eyes are soft, pick another shot.
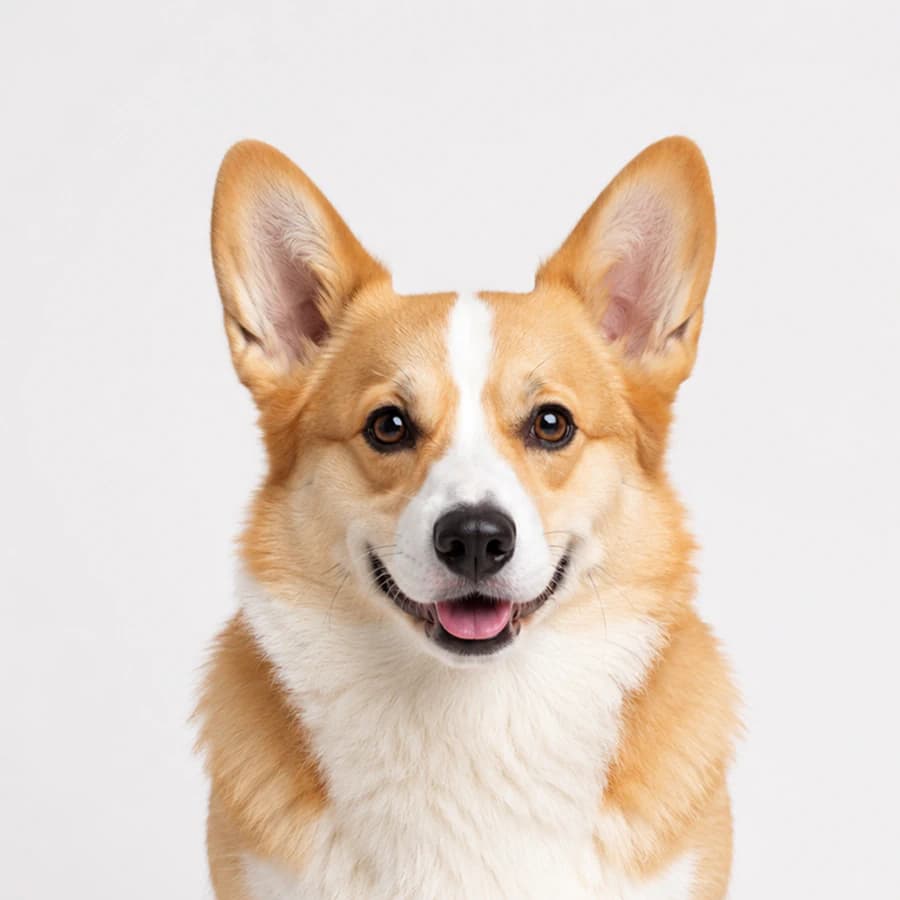
- A pose that reads as a shape. Sitting profiles, head tilts, and perked ears all cut beautifully. A mid-run action blur doesn't.
- The whole pet in frame (or a clean head-and-shoulders crop). An ear clipped by the frame becomes a strange flat edge in vinyl.
Phone photos are completely fine, and if you're doing the whole project from your phone, the phone-to-SVG workflow covers the device-specific steps like HEIC and where downloads land.
Step 2: remove the background for free
Never trace the background; delete it first. On a supported iPhone, touch and hold the pet in Photos to lift the subject from the background, then copy or share it. Android photo editors and web-based removers offer similar workflows. Export as PNG so the transparency survives.
While you're in the editor, bump brightness and contrast a little more than looks natural. The goal is a traceable image rather than a pretty one: the tracer rewards exaggerated edges.
Step 3: pick your style rung
This is the honesty step most guides skip. A trace can't produce every pet portrait style you've seen, and knowing which rung you're on prevents disappointment:
| Style | Layers | What it needs | Realistic result |
|---|---|---|---|
| Silhouette | 1 | Any decent profile photo | Hard to get wrong; instantly recognizable pose |
| Stylized portrait | 2 to 4 | Good light, clear markings | The classic layered-vinyl look |
| Detailed line art | Drawn, not traced | An artist | That's what pet-portrait commissions on Etsy are for |
A silhouette is the safe bet and a genuinely great gift on a mug or car window (the car-decal version has its own guide). The 2-to-4-layer stylized portrait is the sweet spot this guide targets. If what you're picturing is fine whisker-by-whisker line art, skip to the last section: that's hand-drawn work, and buying it is the right call, not a failure.
Step 4: trace it into clean layers
Upload the prepped PNG to an image-to-SVG converter and look at what comes back with a layer-planner's eye. Every color in the result will be its own cut layer, and a straight trace of fur produces far too many: five browns, three greys, and a scatter of in-between specks.
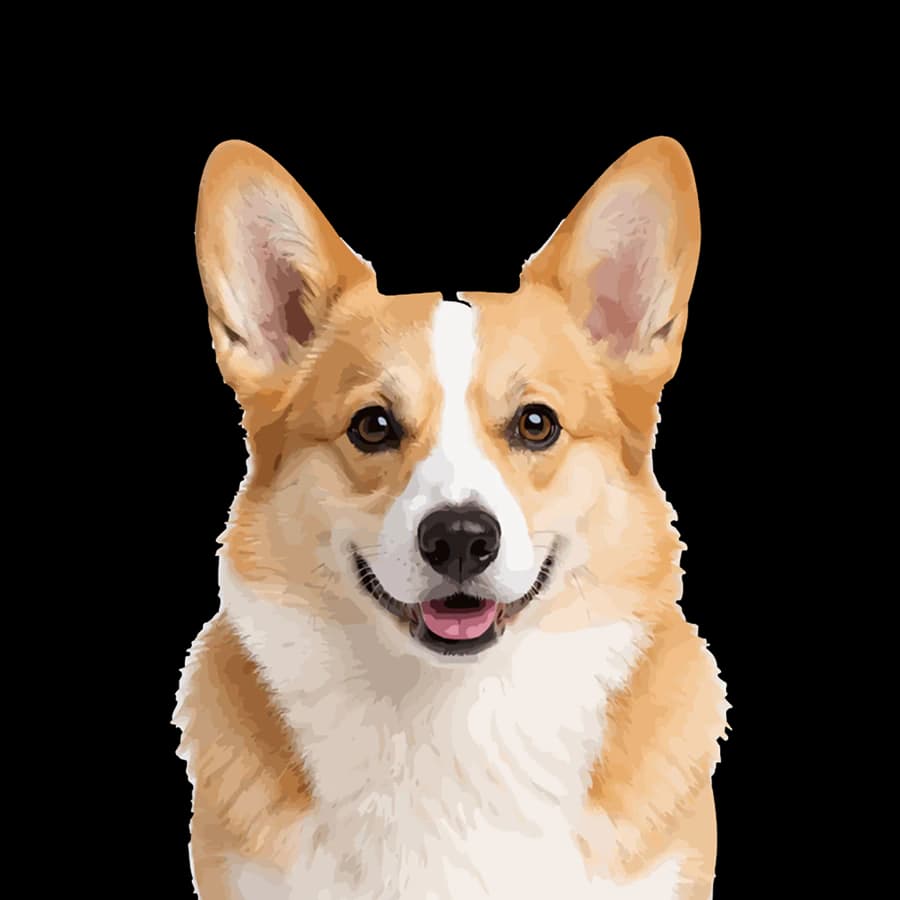
Fix it by merging colors rather than tracing again. Collapse those five browns into one or two, drop the specks, and keep the eyes and nose as their own dark layer, since that's where the likeness lives. In PerfectVector this happens in the built-in color editor before you download: each color is a swatch, merging two is a click, and the preview shows your portrait simplifying in real time. You're aiming for the number of layers you chose in Step 3, and assembling those layers in Design Space works exactly like any other layered SVG. One pro trick borrowed from vinyl artists: put a solid dark silhouette as the bottom layer, and let gaps in the upper layers reveal it as "drawn" lines.
Step 5: think like a weeder before you cut
Zoom your SVG to the size you'll actually cut. A whisker that reads as a crisp line on screen becomes a 0.5mm vinyl thread at sticker size, and threads like that are what make a file miserable to weed. Before cutting: delete or thicken hairline details, close up tiny islands inside the fur, and consider cutting at 6 to 8 inches for the first attempt rather than decal size. Fewer, bolder shapes weed faster and read better from across the room, which is the whole point of a portrait.
What this looks like with PerfectVector
The workflow above maps directly onto the tool: upload the background-removed PNG (PNG, JPG, or WebP, up to 5MB), and the trace comes back as clean paths with each color as its own editable shape. The color editor is where a fur-colored mess becomes a portrait: merge the browns, keep the eye layer, and watch the layer count drop to something a Cricut mat will forgive. Your first conversions are free, no credit card required, so you can test whether your chosen photo survives the trace before committing to vinyl. If the result is headed for a cutting machine, the Cricut preparation guide covers settings and upload from there.
When buying the portrait is the better move
An honest ladder has a top rung you don't climb yourself. For detailed line-art portraits, memorial pieces, or a pet with complex markings, a commissioned hand-drawn portrait can beat an automatic trace. Compare the seller's current examples, deliverables, license, and price rather than relying on a generic range. The traced route wins when the point is your pet's actual pose and markings, made by you, and when the style you want is a silhouette or a bold layered portrait. If you offer the workflow to others, follow the marketplace's current rules and use photos you are authorized to reproduce.
Before you cut
- Background fully removed, including shadows under the paws.
- Colors merged down to your target layer count, eyes and nose preserved.
- Hairline whiskers and specks deleted or thickened.
- Previewed at actual cut size, not full screen.
- Test cut at 6 inches or larger before committing to the final material.
FAQ
How do I turn a photo of my dog into an SVG? Remove the background first (your phone's subject lift or a free web remover), boost the contrast, then upload the PNG to an image-to-SVG converter. Merge the traced colors down to two to four layers and delete tiny specks. The prep is what separates a clean portrait from a blobby trace.
Why does my pet photo look terrible when I convert it to SVG? Almost always because the photo went in unprepped. A busy background gets traced along with the pet, and low contrast gives the tracer no edges to follow. A converter can only trace what it can see; fix the photo and the same tool gives a dramatically better result.
How many layers should a pet portrait SVG have? Two to four for a layered vinyl portrait: a base silhouette, one or two fur tones, and a dark layer for eyes and nose. More layers rarely add likeness, and every extra layer is another mat to cut and weed.
Can I make a pet silhouette from a photo for free? Yes. A clear profile photo, a no-cost background-removal option, and a converter or editor with suitable free access can produce a one-layer silhouette. Check the current export terms before relying on any web tool.
Should I make my own pet portrait SVG or buy one on Etsy? Make it when you want a silhouette or a bold layered portrait of your own pet's pose, today, for free. Buy a commission when you want detailed hand-drawn line art or a memorial-quality piece; those are drawn by an artist, not traced, and that difference is visible.
Can I sell pet portrait SVGs I make from photos? Copyright in a photograph generally belongs to the photographer, not automatically to the person or pet pictured. Use photos you created or licensed, and get clear permission for customer-supplied photos before reproducing them in a commercial portrait. Marketplace rules and local law still apply.
Sources
- Apple: Lift a subject from a photo or video — Documents the supported iPhone background-separation workflow.
- Cricut: Upload images into Design Space — Explains SVG and raster upload handling for cut and layered projects.
- U.S. Copyright Office: Copyright and photographs — Explains photographer ownership, permissions, and licensing basics.
- Etsy: Creativity Standards — Current rules for seller-designed, personalized, and AI-assisted items.
The likeness was in the photo all along; the craft is in reducing it. Pick a shot with real contrast, delete the background, and trace it into clean, mergeable layers. The cleaner the source and the simpler the style, the shorter the path from camera roll to portrait.
More from the blog
HEIC Photo to SVG: Decide When Tracing Makes Sense
You can trace a supported HEIC into SVG, but most photos should stay raster. Use this guide to choose, prepare the image, and inspect the paths.
Can You Vectorize Gradients? Pick the Right Method
Learn when a raster gradient can be traced, when it should be rebuilt as a native SVG gradient, and when keeping the original image is the cleaner choice.