Turn a Child's Drawing Into an SVG (Wobble and All)
Turn your kid's drawing into an SVG for shirts, ornaments, and cards: photograph it right, handle crayon and marker, and keep the wobble that makes it theirs.
On this page
A child's drawing with bold lines and simple shapes can be a good vectorization source. Photograph it in even light, trace it into paths, and inspect whether the result preserves the character of the original. The SVG can then become a cut, engraving, or print source after you test it in the receiving tool.
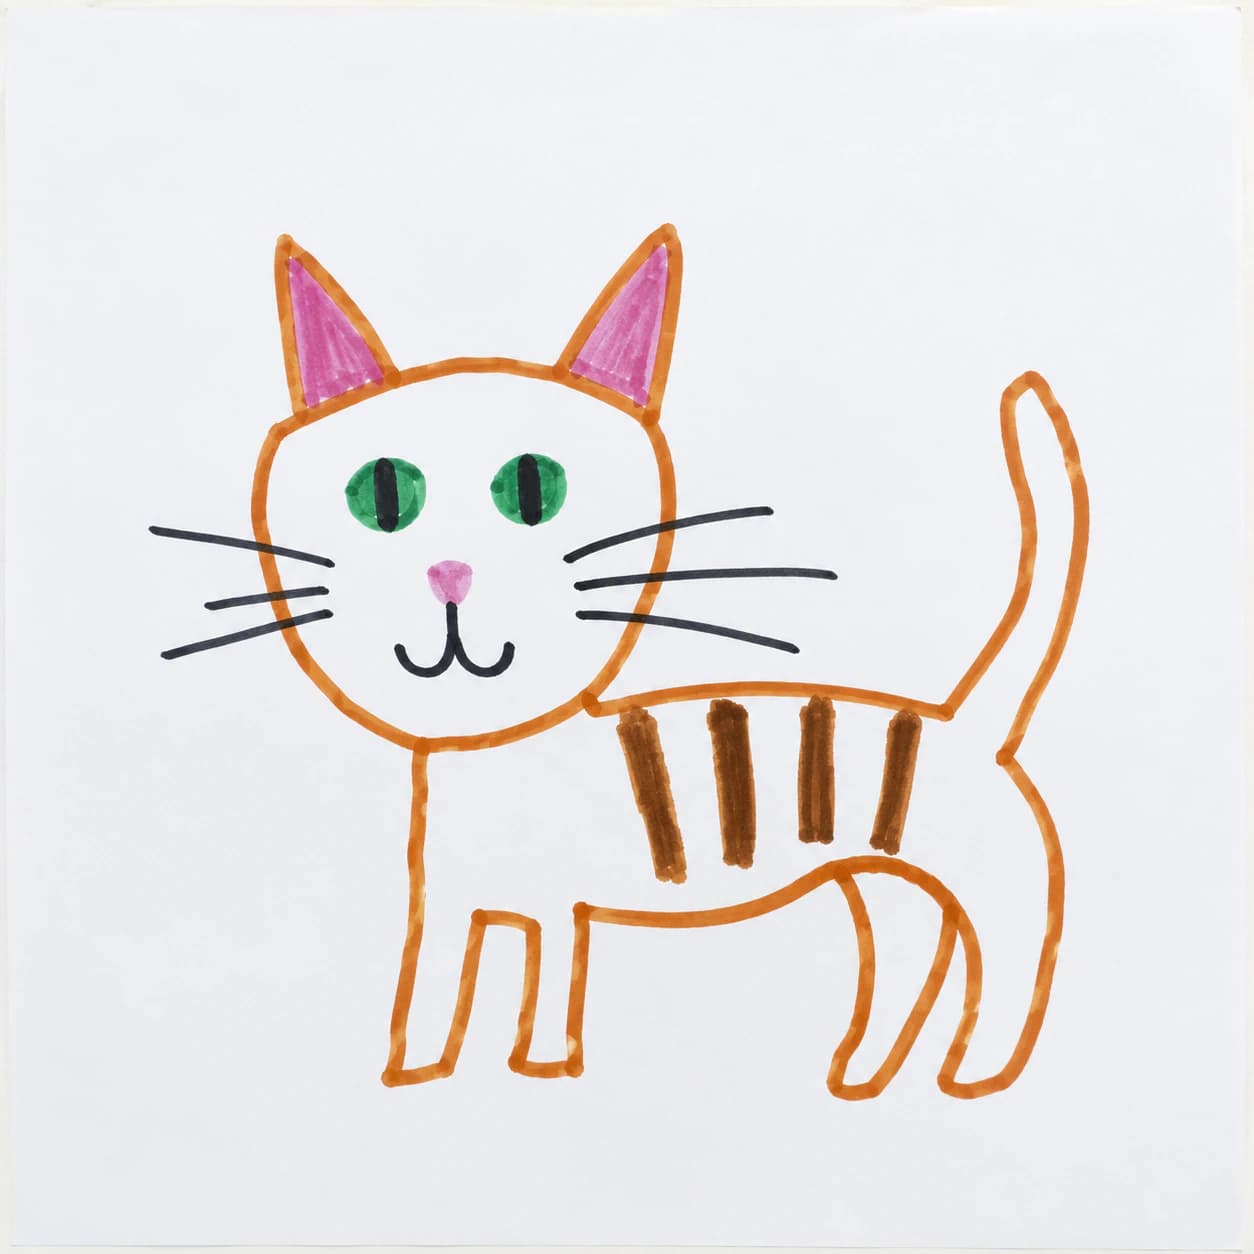
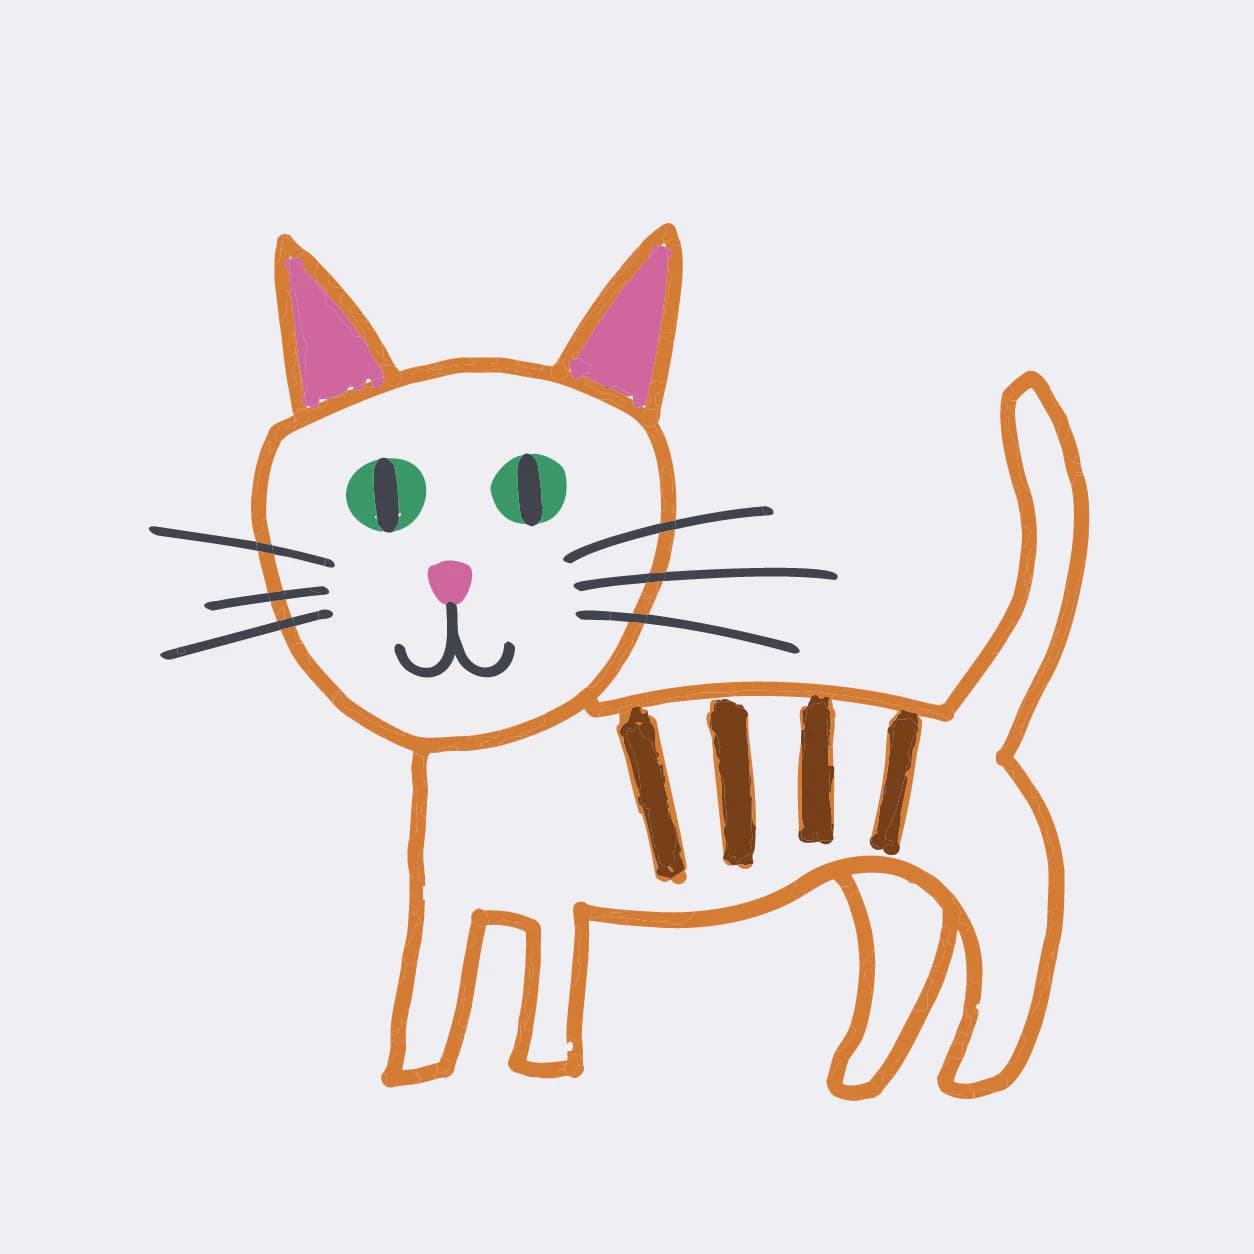
One rule governs everything, and it's the one tutorials get backwards: the wobble is the point. A shaky sun, a dog with five legs, letters that lean into each other, that's the artwork. Your job is to remove the paper, the shadows, and the smudges, and to keep every wobbly line exactly as drawn. This guide covers the parts specific to kid art: crayon and marker, color decisions, and where the keepsake actually ends up.
The quick version
- Keep the wobble. Clean up the paper and smudges; never "fix" the drawing itself.
- Marker and ink trace best. Crayon and pencil have texture the tracer reads as noise; a quick photo-contrast boost tames most of it.
- Two routes: line-only (classic one-color shirt) or full-color (each marker color becomes its own layer).
- Photograph it flat and bright; the line art guide has the full capture checklist.
- The name and age caption in their handwriting is its own small trace job, and worth doing.
Why kid art traces so well (and the one thing that fights you)
Vectorizers love exactly what kids produce: closed-ish shapes, strong outlines, flat color, no shading to misread. A six-year-old's dinosaur converts more cleanly than most adult sketches.
The fight is the medium. Ink and marker lay down solid color, so they trace crisply. Crayon and pencil are texture: the tracer sees every waxy gap and grain of the paper and either speckles the result or breaks strokes into fragments. You don't need to re-draw anything; you need contrast. Photograph the drawing brightly, then push brightness and contrast until the strokes read as solid against clean white. A crayon line will never be as sharp as a marker line, and it doesn't have to be; it has to be solid enough to read as one stroke.
For the capture itself, everything from the line art playbook applies: shoot flat, straight down, in daylight, no shadows across the page. Kid-specific addition: flatten the paper first. Drawings live folded in backpacks, and a crease photographs as a line the tracer will faithfully include.
Clean the paper, not the drawing
Before converting, edit the photo with three goals, all about the page rather than the art:
- Crop to the drawing, out past any fold lines and torn edges.
- Erase what isn't art: smudges, eraser ghosts, the corner where a sibling added their contribution (or keep that, your call, but decide).
- Leave the lines alone. No smoothing filters, no straightening. If a line doesn't touch where it clearly meant to, resist closing it digitally; the trace step handles small gaps, and hand-editing strokes is how the drawing stops looking like theirs.
One color, or all of them?
Kid art splits into two happy paths, and it's worth choosing before you trace:
| Route | Best for | What you get |
|---|---|---|
| Line-only | Ink or dark-marker drawings, HTV shirts, engraving | One-color SVG of just the strokes: the classic keepsake shirt look |
| Full-color | Marker and crayon art with filled areas | Each color as its own layer, cut in vinyl or printed as-is |
The line-only route is the forgiving one: trace the dark strokes, drop everything else, and cut it in one color of vinyl. The full-color route makes the tracer's color handling matter: a red marker area may come back as three near-identical reds, so merge each marker's tones into one until the layer count matches the actual pens used. Cricut's current upload guide explains that layered SVGs arrive as separate layers, while raster uploads arrive through the basic-image flow. Four colors of vinyl is a pleasant afternoon; eleven accidental shades of red is not.
What this looks like with PerfectVector
Upload the cleaned-up photo (PNG, JPG, or WebP up to 5MB) and convert it into an SVG. What you want from the trace is fidelity with tidiness: solid, editable paths that follow the strokes as drawn, no stray specks from the paper, and each color kept as its own shape so the layer decisions above are click-work in the built-in color editor rather than surgery. Zoom the preview and check the wobble survived; that's the acceptance test for this project. Vectorizing and previewing are free; one credit unlocks the finished SVG.
If the drawing includes their name, trace that too. A signature-style caption in their actual handwriting turns a cute shirt into a dated artifact, and handwriting has its own small playbook worth the two extra minutes.
From SVG to keepsake
Where these files actually end up, with the one production note each needs:
- The shirt is the classic: one-color HTV of the line drawing, and shirt artwork wants vector for exactly this reason. Cricut's current Everyday Iron-On instructions say to mirror the mat before cutting.
- Ornaments and plaques: engrave the line-only version; the wobble engraves beautifully. Size up so the thinnest stroke survives the material.
- Totes, mugs, cards: vinyl or print, either route. On small items, cut the drawing larger than feels safe; tiny wobbles become unweedable threads.
- The grandparent multiplier: one SVG, every gift this year, still sharp on all of them.
If the drawing is precious and complex, or you want it redrawn as polished line art rather than traced as-is, Etsy digitizing services do that by hand. That's a different product: theirs is a cleaned-up interpretation, this workflow's is the drawing itself. For a pet-photo version of the same gift energy, the pet portrait workflow is the sibling guide.
For a printable activity, reuse a suitable drawing as coloring-page artwork, checking every small enclosed shape.
Before you cut
- Wobble intact: compare the SVG against the photo at the same size.
- Paper artifacts gone: no specks, fold-lines, or smudge shapes in the layers.
- Colors merged to the number of actual pens used.
- Thinnest stroke checked at final cut size.
- Original photo archived next to the SVG; the drawing itself won't last, which is why you did this.
FAQ
How do I turn my kid's drawing into an SVG for Cricut? Photograph it flat in bright light, boost the contrast so strokes read solid on white, crop out the paper edges, and run it through an image-to-SVG converter. Choose line-only for a one-color cut or keep the colors as layers, then upload the SVG to Design Space.
Can I do it from a photo, without a scanner? Yes; a phone photo works if the page is flat, evenly lit, and shot straight down. A scanner gives the most even result for crayon and pencil, but daylight plus a contrast boost gets a phone photo to the same place for most drawings.
Does crayon work, or only marker? Marker and ink trace best because the lines are solid. Crayon and pencil carry texture the tracer reads as noise; push the photo's contrast until strokes look solid, and accept slightly rougher edges as part of the charm. If a crayon drawing traces badly, a quick marker trace-over of the original is the honest analog fix.
How do I keep it looking hand-drawn? Don't edit the strokes. Clean the paper, not the drawing: no smoothing, no straightening, no closing gaps by hand. A good trace preserves the shaky lines as-is, and that wobble is what makes the result recognizably theirs.
What can I make with a child's drawing SVG? Shirts and totes in HTV, engraved ornaments and plaques, mugs, cards, stickers, and framed prints at any size. Because it's a vector, one file covers all of them without ever blurring.
Should I trace their colored-in drawing or just the outlines? Both work. Line-only gives the classic one-color keepsake and is the easier cut. Full-color keeps their filled areas as separate layers; merge each marker's near-duplicate tones so the layer count stays equal to the pens they actually used.
Sources
- Cricut — How to upload images into Design Space — supported raster and vector uploads, plus layered SVG behavior.
- Cricut — Everyday Iron-On instructions — mirroring and application workflow for iron-on projects.
- National Archives — Technical Guidelines for Digitizing Archival Materials — preservation-master and capture-quality principles for paper artwork.
- W3C — SVG Paths — how SVG paths represent scalable geometry.
The drawing on the fridge will fade. Photograph it in even light, trace it into paths, and check that the child's deliberate wobble survived. If you plan to cut the result, continue with the Cricut preparation guide.
More from the blog
Vectorize Hand Lettering Without Losing Its Shape
Turn hand lettering into a clean SVG while keeping open counters, expressive terminals, intentional texture, and curves that remain easy to edit.
Shopify Custom SVG Icons: Prepare a Clean Brand Mark
Prepare a custom SVG icon for a Shopify theme, then choose an image asset or inline Liquid snippet. Check paths, color control, sizing, and accessibility.