LightBurn Cuts Outside First: Check Groups and Layers
Diagnose outside-first LightBurn cuts with a simple SVG, closed-path checks, group and layer review, and Preview verification before choosing the job order.
On this page
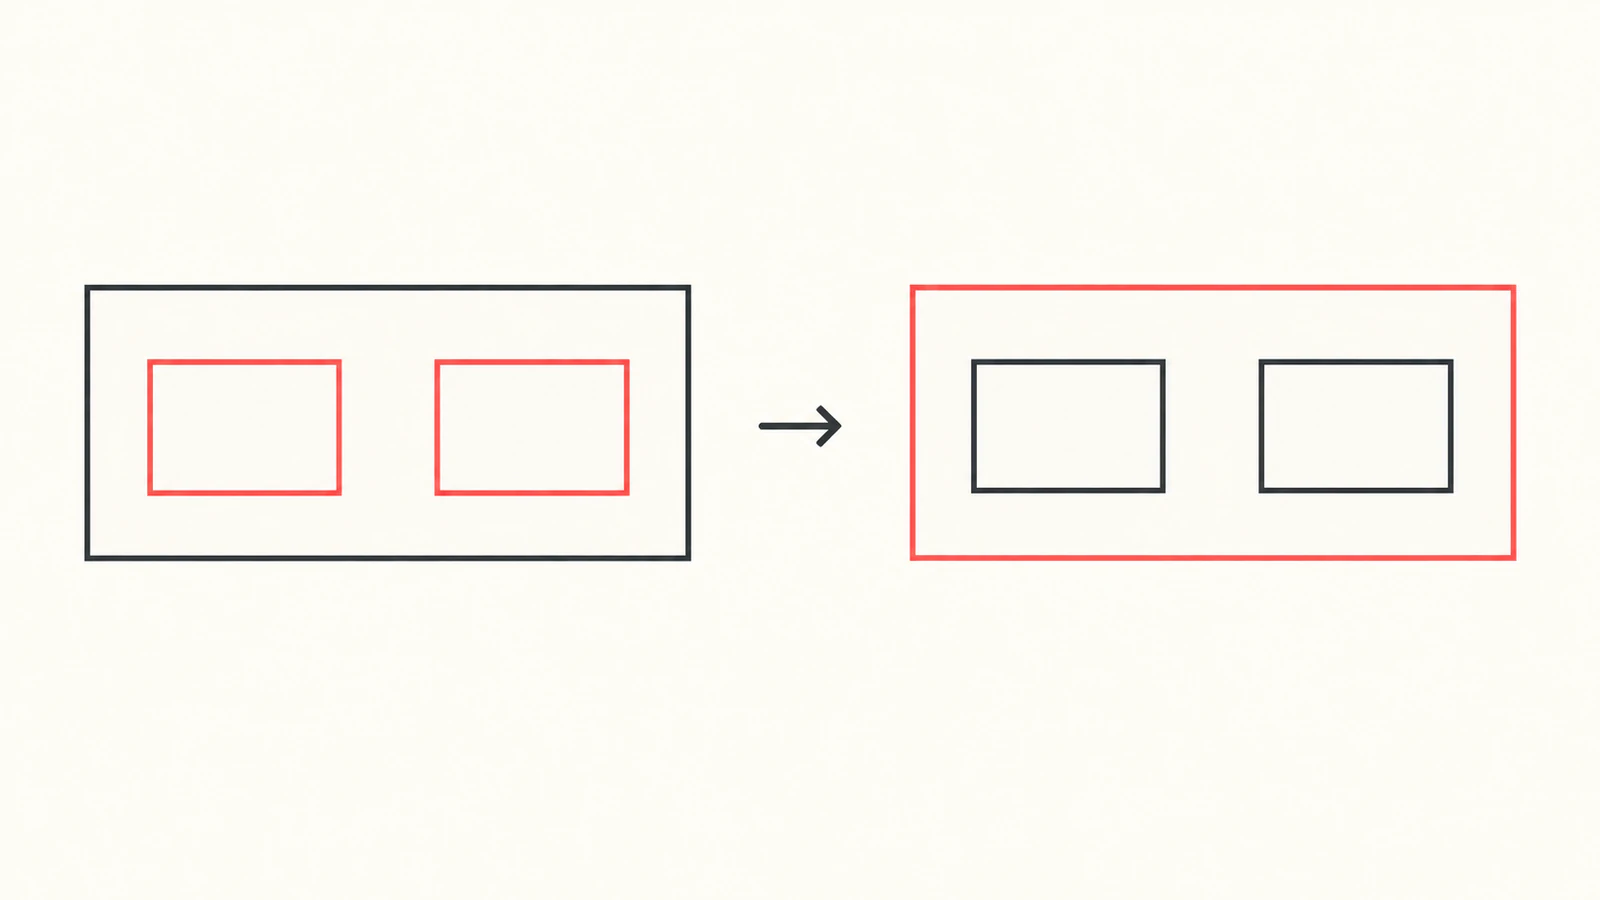
If LightBurn is not cutting inner shapes first, check the outer contour's closure and the job's groups and layers before retracing the SVG. A picture of a hole inside a border is only the starting point; you need to inspect the imported shapes and the planned sequence.
LightBurn's Open vs. Closed Shapes guide lists Cut Inner Shapes First among the functions that require closed geometry. A nearly invisible gap can therefore matter even when the artwork looks correct.
Check the active job before changing geometry
Open Optimization Settings from the Laser window. Enable Enable Optimization and Output Re-ordering, then check Cut inner shapes first. The documented rule applies to an object inside another object when both are being cut; the outer shape must be closed. The Order by list first divides the job by its chosen Layer, Group or Priority parameters, in list order. Optimizations then operate on those resulting sets. These are separate stages of the cut planner.
Write down what you see before editing. That gives you something concrete to compare after each change:
| Inspect | Record for the affected part |
|---|---|
| Geometry | Outer contour, inner contours, gaps and duplicate boundaries |
| Organization | Which objects belong to each group |
| Operations | Layer assignments, modes and Output switches |
| Planner | Enabled options and the order of the Order by entries |
| Result | Which contour begins first in Preview |
Do this in the file that misbehaves. Saved LightBurn projects load their saved optimization settings, so a setting chosen in another project may not describe this job. Optimization Settings documentation explains that file-level behavior.
Use a simple nested-contour SVG to isolate the problem
Save the following as closed-part.svg. It contains one outside rectangle and two inner rectangular contours, each a separate path. The document is 100 × 60 mm; the outside contour spans 80 × 40 units. The thin stroke makes the paths visible and is not a kerf allowance or a laser power setting.
<svg xmlns="http://www.w3.org/2000/svg"
     width="100mm" height="60mm" viewBox="0 0 100 60">
  <g id="part" fill="none" stroke="#222" stroke-width="0.4">
    <path id="outer" d="M10 10H90V50H10Z"/>
    <path id="left-hole" d="M24 22H42V38H24Z"/>
    <path id="right-hole" d="M58 22H76V38H58Z"/>
  </g>
</svg>
We authored this example and inspected three source variants in a browser at 160 and 400 CSS pixels. The closed baseline and a version with the outside and holes in separate SVG groups looked alike and retained identical path data. A third version changed only the outside path to this:
<path id="outer" d="M10 10H90V50H10V10.2"/>That endpoint is 0.2 units from the start, and the path has no closing command. The small gap was hard to distinguish at these display sizes. In the baseline, Z explicitly connects the subpath back to its start, as defined by the SVG path specification.
These observations establish source geometry and browser appearance. They do not establish LightBurn's imported groups, computed cut order or a physical cutting result. Use the example as a comparison file in your own LightBurn workspace, then verify the import there. If the simple part previews as intended while your artwork does not, compare one difference at a time rather than rebuilding everything.
Confirm closure inside LightBurn
Select the affected outside contour and use Measure (Alt/Option + M) to read its Closed/Open status. Edit Nodes also exposes start and end nodes. LightBurn's closure guide warns that endpoints can even overlap visually without being connected.
If it is open, inspect the intended join. Repair that join with node editing or an appropriate Close Path tool, then check the contour again. Do not run a broad tolerance-based repair without examining what it joined: a small deliberate slot or score line should not become an unwanted closed loop.
For the original SVG above, restoring the outside path to M10 10H90V50H10Z restores its explicit source closure. In your imported job, confirm the resulting LightBurn shape rather than relying on the filename or the presence of a final letter in unrelated SVG paths.
Two nearby contours can also be two legitimate boundaries or a duplicated path. That is a different diagnosis. Use the double-cut SVG guide if the laser follows the same area twice, and keep kerf compensation separate from repairing closure.
Inspect group membership and layer assignments
A group is an organizational unit. LightBurn lets you group objects on different layers and ungroup them for individual editing. Imported artwork is grouped by default unless that import setting has been disabled. Read the actual selection and, if necessary, ungroup enough to inspect the part, following the grouping documentation.
With Order by Group, one group's objects are processed before the next group. Keep a part's holes with its outside boundary when that is the unit you intend to process together; do not assume their visual nesting makes them one planning set. Order by Group documents this behavior.
The split-group source variant can be reproduced by replacing the single g wrapper in the baseline with these wrappers, leaving all three path values unchanged:
<g id="outer-group" fill="none" stroke="#222" stroke-width="0.4">
  <path id="outer" d="M10 10H90V50H10Z"/>
</g>
<g id="holes-group" fill="none" stroke="#222" stroke-width="0.4">
  <path id="left-hole" d="M24 22H42V38H24Z"/>
  <path id="right-hole" d="M58 22H76V38H58Z"/>
</g>
This changes the source organization without changing its contours. Inspect what LightBurn actually imports; its settings can affect grouping. The example does not promise a particular import hierarchy or outside-first failure.
Next, inspect Cuts / Layers. Its colors identify operations rather than finished artwork colors. Confirm the holes are assigned to intended Line operations and have Output enabled. Show controls visibility and is a separate switch. You can select objects and use the palette to assign their layers. The Cuts / Layers reference explains these controls.
If you deliberately use different layers for holes and outside cuts, place them in the intended processing order and check the active planner list. Sort Cuts Last organizes layers by strength and moves Line layers after engraving layers; it is not a direct instruction to order every hole before every outside contour. Do not treat it as a replacement for inspecting this part's sequence.
For deliberate priorities, Shape Properties → Cut Order Priority uses lower values first, beginning at 0, and requires Order by Priority to take effect. See the Shape Properties reference. Test priorities in Preview within the job's existing organization before adopting them across a sheet of parts.
Verify the plan in Preview
Open Window → Preview or press Alt/Option + P. Move the Time Slider through the job and watch the affected part. LightBurn's Preview reference describes this as a way to inspect the sequence, with cutting movements shown in black and traversal moves in red when enabled.
For the simple example, your acceptance check is specific: both inner contours should finish before the outside release contour begins. Record the observed order rather than assuming a checked box proves it. After changing one item, reopen Preview and compare the same part. Preview display settings do not change the output plan.
If the order still differs, keep the smallest saved project that reproduces it, along with your LightBurn version, planner list, layer assignments and closure findings. That is more useful for support than an image of the finished artwork alone. This guide does not assert a release-specific bug or a universal toggle fix.
Preview is a planning check. Machine setup, material behavior and the physical result still need their own verification. For the wider preparation workflow, continue with image-to-SVG for laser cutting.
When raster conversion helps
If the artwork exists only as a PNG or JPG, prepare vector geometry for laser cutting, then inspect the outer contour, holes and unwanted fragments before importing the SVG. PerfectVector handles raster-to-vector preparation; you still assign operations and verify order in LightBurn. It cannot guarantee a CAM sequence. If you already have suitable paths, work on their closure and job organization first. The LightBurn tracing guide covers the alternative of creating paths inside that workspace.
FAQ
Why does a hole look enclosed but fail the closure check? The outside contour can have a tiny gap or disconnected endpoints that overlap visually. Inspect its Closed/Open status and nodes inside LightBurn before repairing the intended join.
Should I put holes and the outside contour on different layers? Use different layers when their operations need different settings. Check their processing order and the active planner list, then verify the affected part in Preview.
Does grouping merge the holes with the outer path? Grouping organizes objects into a unit; it does not replace this example's three source paths with one contour. Inspect the imported group and individual shapes in LightBurn.
Can a vectorizer set LightBurn's cut order? A vectorizer can supply path geometry. Layer assignments, planner settings and Preview verification remain part of the LightBurn job.
Sources
- LightBurn — Optimization Settings — active optimization, ordered planning sets, inner-first conditions and saved project settings.
- LightBurn — Open vs. Closed Shapes — closure diagnosis, endpoint checks and repair methods.
- LightBurn — Grouping and Ungrouping — organization, imported grouping and individual editing.
- LightBurn — Cuts / Layers Window — operation assignments, Output, layer ordering and Sort Cuts Last.
- LightBurn — Shape Properties Window — Cut Order Priority and its enabling planner option.
- LightBurn — Preview — Time Slider, movement display and simulation limits.
- W3C — SVG Paths — explicit closepath behavior used in the original fixture.
If your starting artwork is raster, convert it into laser-ready vector geometry, inspect the contours, then assign operations and verify the planned sequence in LightBurn.
More from the blog

Image to SVG for WeCreat MakeIt: Import Clean Paths
Prepare and import a clean SVG into WeCreat MakeIt. Fix scale, layers, colors, holes, and duplicate paths before assigning cut or engraving operations.

Image to SVG for xTool: Built-In Trace or Clean SVG?
Choose between xTool Creative Space Image Trace and an imported clean SVG, then check contours, stray regions, nodes, scale, and laser operations after import.