Vectorize a BMP Without Tracing Every Pixel Defect
A BMP can preserve hard edges and every source defect. Learn how to clean it selectively, trace it into editable SVG paths, and inspect the result.
On this page
- First, “BMP” can mean two different things
- Decide which pixels are defects
- Prepare the BMP without sanding away the design
- Convert a supported BMP or DIB to SVG
- Audit the SVG before you trust it
- 1. Silhouette
- 2. Holes and gaps
- 3. Colors and background
- 4. Nodes and editability
- When PNG export or manual redraw is better
- FAQ
- Sources
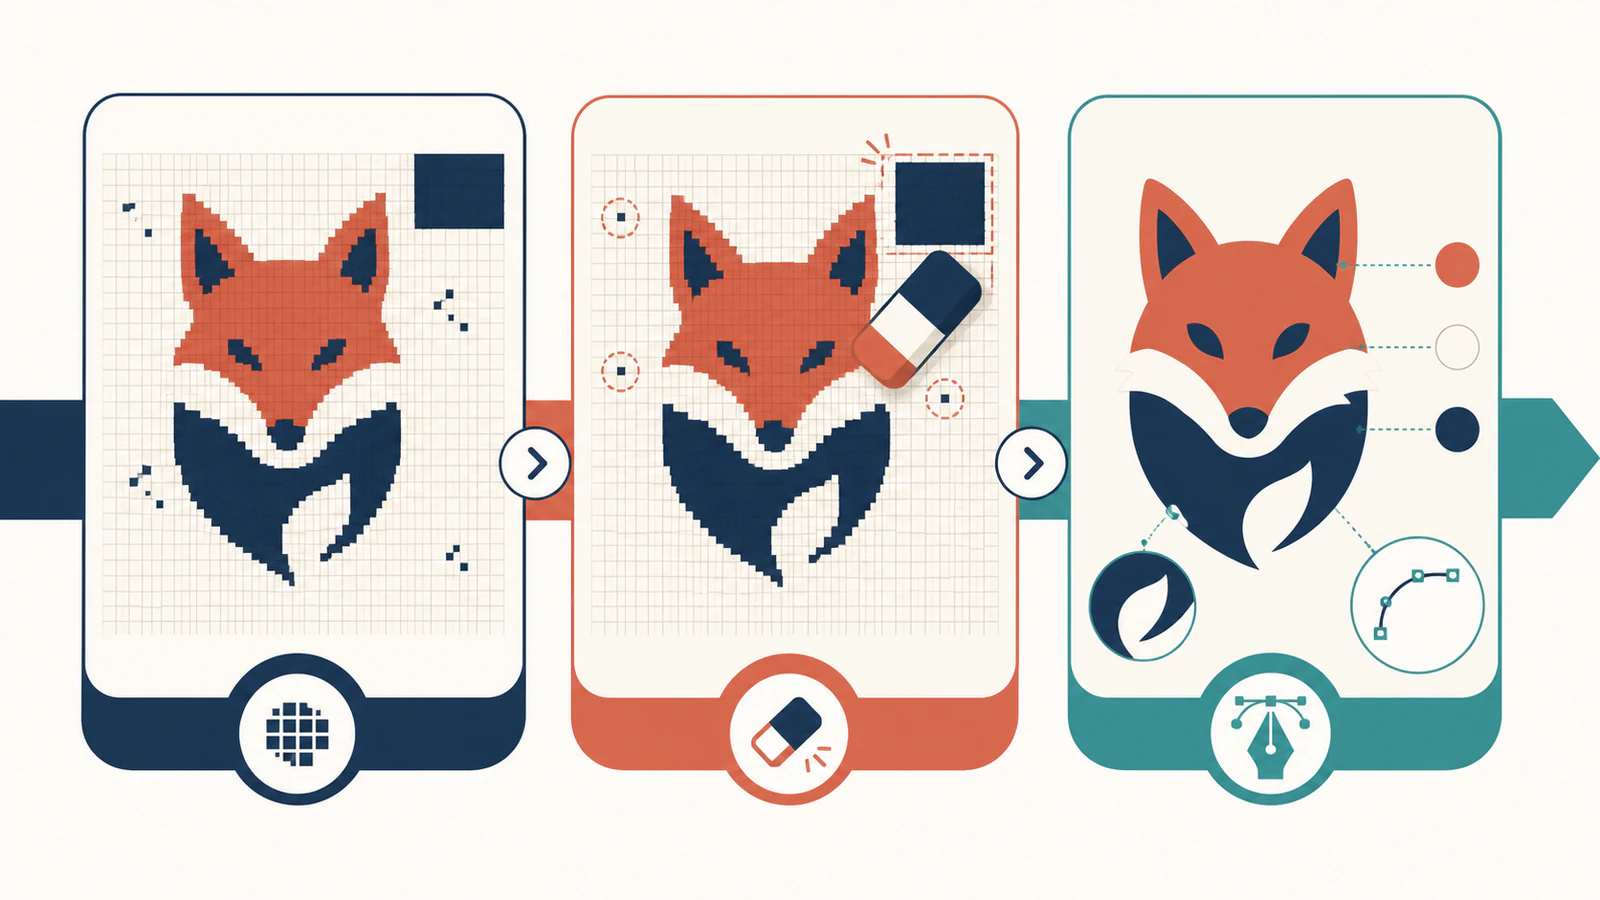
A BMP image is not already a vector. It is a grid of pixels stored in a Windows bitmap file, so making it scalable and shape-editable requires tracing those pixels into paths. The important detail is that “uncompressed” does not mean “clean.” A BMP may avoid adding JPEG compression artifacts, yet preserve every jagged edge, stray speck, resampling halo, and painted background already present in the source.
Do not blur the whole image and hope the defects disappear. Keep the original, clean a working copy selectively, trace it, and audit the result against the source. Intentional hard edges should survive; accidental pixel noise should not become hundreds of tiny vector shapes.
The short workflow
- Confirm that the file is actually
.bmpor.dib, not just a generic “bitmap image.” - Inspect it at 100% and deep zoom before changing anything.
- Preserve intentional hard edges; remove only isolated defects and unwanted backgrounds.
- Trace a supported working copy into SVG.
- Check the silhouette, holes, colors, and node structure before using the result.
First, “BMP” can mean two different things
People often use bitmap to mean any raster image, including PNG, JPG, GIF, and WebP. This guide is about a Windows bitmap file with a .bmp extension, plus the closely related device-independent bitmap (DIB) form. Microsoft’s bitmap storage documentation describes a bitmap file as a header plus DIB data.
That distinction matters when you troubleshoot a failed upload. Advice for a “bitmap” may really assume a PNG or JPG. BMP itself is also a family of layouts rather than one universal encoding: files can differ in bit depth, header type, compression, orientation, palette handling, and alpha behavior. The Library of Congress BMP format description catalogs that variation and the format’s dependence on DIB headers.
None of those variations changes the basic vectorization problem. The file stores pixels. An SVG stores shapes and paths. Tracing interprets one representation and builds the other; changing the filename does not.
Decide which pixels are defects
Before cleanup, inspect the BMP at 100% zoom and again around 800%. At 100%, judge what the artwork actually communicates. At deep zoom, locate the pixel structures that may turn into unwanted paths.
| What you see | What it may mean | What to do |
|---|---|---|
| Square stair-steps on a low-resolution diagonal | Too few source pixels, or intentional pixel art | Rescan or find a larger source; preserve the grid if it is the design |
| Pale or dark rim beside an edge | Sharpening or resizing halo from an earlier edit | Clean the rim locally or return to an earlier source |
| Random one- or two-pixel dots | Dust, scan noise, or old export debris | Remove isolated specks from a copy |
| One large rectangle behind the art | Background painted into the raster | Remove it before tracing if transparency is required |
| Several nearly identical colors in a flat area | Palette drift, anti-aliasing, or prior resampling | Merge colors only when they are not meaningful |
| Blocky 8×8 texture around edges | The image may once have been JPEG-compressed | Find the pre-JPEG source if possible; a BMP resave cannot undo it |
The cleanup target is not a universally smoother image. It is a working copy whose deliberate pixel structure remains intact while isolated noise, halos, and unwanted background pixels stop competing with the subject.
The last row catches a common misconception. A file that ends in .bmp today may have been copied from a JPEG yesterday. Re-saving changes the container, not the damaged pixels. Compare the artifact patterns in the JPG-to-SVG guide if you suspect an earlier lossy export.
Prepare the BMP without sanding away the design
- Keep the original file. Treat the legacy BMP as an archive master, even if it looks rough. Work on a duplicate.
- Identify where it came from. A screenshot, scanner export, old paint program, and re-saved logo fail in different ways. Provenance tells you whether a hard edge is intentional.
- Crop irrelevant pixels. Remove scanner-bed borders, annotations, and empty canvas that do not belong in the vector.
- Remove isolated defects locally. Use a hard-edged eraser, mask, or selection at the source resolution. A global blur softens the intended edges along with the noise.
- Clear the background deliberately. If the SVG needs transparency, separate the artwork from the background before tracing. Use the transparent-background SVG checks afterward to catch a hidden rectangle.
- Reduce colors only for flat art. A logo with accidental near-duplicate blues may benefit from palette consolidation. A shaded illustration may need those transitions.
- Save a working copy without enlarging it. Upscaling the same pixels creates interpolation, not original detail. Find a larger source or redraw when resolution is the limiting factor.
Pixel art is the important exception. Its stair-steps and square corners may be the authored geometry, not defects. Smoothing them changes the design. Decide whether you want the grid preserved as block shapes or the subject reinterpreted as smooth curves before you trace.
Convert a supported BMP or DIB to SVG
PerfectVector supports a bounded set of common uncompressed Windows BMP and DIB layouts. That includes proven palette, 16-bit, 24-bit, and opaque 32-bit sources in bottom-up or top-down orientation. The browser inspects the real bytes, prepares a compatible source locally as a verified PNG, and then sends that prepared image through the normal vectorization workflow.
RLE and other compressed BMP variants, unsupported headers, and non-opaque 32-bit layouts fall outside that path. If a legitimate file is rejected, open it in an image editor and export the intended pixels as PNG. Do not merely rename the extension: that leaves the internal file unchanged.
For a compatible source:
- Open the BMP to SVG converter.
- Upload the cleaned working
.bmpor.dibfile. - Let the browser inspect and prepare the image.
- Review the vector preview at normal size and deep zoom.
- Download the SVG only after the audit below passes.
PerfectVector is useful here because it handles the file-format step and the tracing step without pretending they are the same thing. Local preparation makes a supported BMP readable to the pipeline. Vectorization then interprets its pixels as editable shapes. Neither step can know that a particular speck is unwanted or that one crooked corner carries the character of the original—that judgment stays with you.
Audit the SVG before you trust it
Use four checks in this order:
1. Silhouette
Compare the outer contour at fit-to-screen size. The subject should read the same without bumps caused by isolated pixels. If the overall shape changed, source resolution or contrast is the first problem to revisit.
2. Holes and gaps
Inspect counters inside letters, spaces between touching shapes, and narrow negative areas. A small raster gap can close during tracing; a speck can also punch an accidental hole into a solid region.
3. Colors and background
Select the major regions. Flat colors should not be split into many near-duplicates unless the source genuinely contains shading. Place the SVG over a contrasting color to confirm that an unwanted background rectangle is gone.
4. Nodes and editability
Select a few curves in a vector editor. A smooth arc should not be built from a nervous chain of anchors following every pixel boundary. If it is, use the too-many-nodes diagnosis before hand-editing hundreds of points.
A usable SVG does not need to reproduce every source pixel. It needs to preserve the intended design as coherent paths.
When PNG export or manual redraw is better
Export the BMP to PNG first when the container variant is unsupported, you need to establish real transparency, or your editor can decode the source more reliably. PNG remains raster, so this is a compatibility step, not vectorization or quality enhancement. Compare the exported PNG against the BMP before tracing it.
Redraw instead when the only source is tiny, text or geometry must be exact, the logo is legally or operationally brand-critical, or cleanup would take longer than rebuilding the few intended shapes. The logo vectorization decision guide explains where automatic tracing stops being the safest production method.
FAQ
Is a BMP file already a vector image? No. A BMP stores a fixed grid of pixels. It must be traced or redrawn into paths before it becomes an editable vector such as SVG.
Does BMP vectorize better than JPG? It can, when the BMP contains clean hard-edged artwork that has not passed through JPEG. Uncompressed storage avoids adding JPEG artifacts, but it preserves any blur, noise, or old compression damage already in the pixels.
Why does my BMP-to-SVG result have jagged curves? The tracer may be following low-resolution stair-steps or a noisy edge. Look for a larger source, clean isolated defects without blurring the whole image, then retrace. Preserve the steps if they are intentional pixel art.
Can PerfectVector convert a DIB file as well as BMP? Yes, within its supported uncompressed Windows bitmap subset. Compatible raw DIB artwork is wrapped and prepared locally; unsupported headers, compression, or alpha layouts are rejected.
Can I rename a BMP file to SVG? No. Renaming changes only the filename. The file still contains raster pixels, while a real SVG needs vector paths or other SVG geometry.
Sources
- Microsoft Learn — Bitmap Storage — Defines the file-header and DIB structure used by Windows bitmap files.
- Microsoft Learn —
BITMAPFILEHEADER— Documents the BMP file header and bitmap-data offset. - Microsoft Learn —
BITMAPV4HEADER— Documents bit depth, compression, color masks, and top-down versus bottom-up orientation. - Library of Congress — Microsoft Windows Bitmap — Summarizes BMP/DIB variants and sustainability characteristics.
- PerfectVector — BMP to SVG Converter — States the product’s current BMP conversion workflow.
Keep the legacy master, make one deliberate working copy, then vectorize the BMP with PerfectVector. Accept the SVG only after the silhouette, holes, colors, and node structure survive your audit.
More from the blog

HEIC Photo to SVG: Decide When Tracing Makes Sense
You can trace a supported HEIC into SVG, but most photos should stay raster. Use this guide to choose, prepare the image, and inspect the paths.

How to Turn an ICO File Into an Editable SVG
An ICO can hide several bitmap sizes of the same icon. Learn how to recover the strongest source, trace real editable SVG paths, and know when to redraw.