Cricut Print Then Cut: PNG or SVG? (The Honest Answer)
Print Then Cut prints pixels either way, so a good PNG is the native choice. Where SVG still earns its place: resizing, clean cut lines, dual-use designs.
On this page
For a straightforward Print Then Cut project, a high-resolution PNG with a transparent background is the native choice, and you don't need to convert anything. Print Then Cut means your home printer prints the design and the Cricut cuts around it, and a printer prints pixels no matter what file you started from. Even an SVG gets flattened into a printable image on its way to the printer.
So why does the question keep coming up? Because "use a PNG" is only the right answer when the PNG is good enough, at the size you're actually printing, and because SVG quietly solves three problems the PNG route runs into. This is the decision guide for which file to start from, and for the misconception in the middle of most forum answers.
The quick version
- Print Then Cut is raster at print time. The printer prints pixels; even SVG layers get flattened to an image first.
- A good PNG is enough: high resolution at final print size, with a transparent background.
- SVG earns its place when you resize designs per project, want a clean offset cut line, or use the same design for both cutting and printing.
- Design Space does not vectorize your PNG for printing. Upload it small and blurry, and it prints small and blurry.
- Materials note: compatible colors and finishes depend on the Cricut model; reflective and some glossy materials can interfere with sensor scanning.
What Print Then Cut actually does
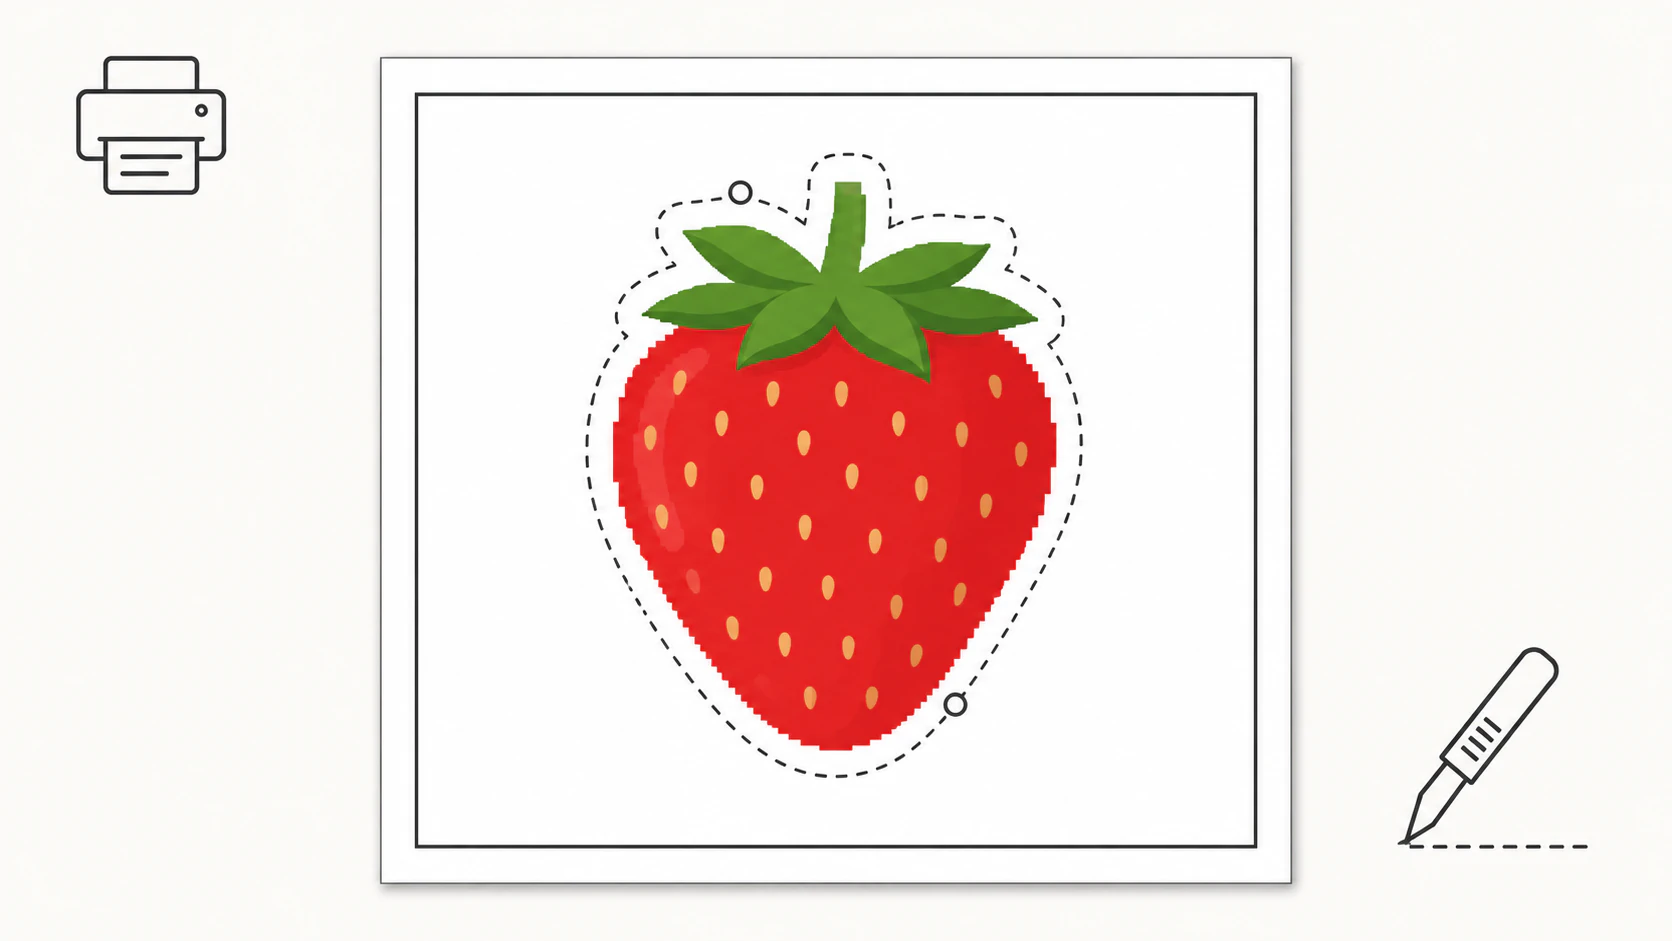
The workflow, mechanically: Design Space sends your design to a compatible home printer, adds sensor markings around it, your machine reads those markings, and then cuts around the printed art. Cricut documents this sequence in its current Print Then Cut guide. Two facts follow from this, and they settle most of the format debate:
- The printed part is raster, always. Whatever you uploaded, the printer receives pixels. SVG layers get flattened into a printable image inside Design Space before printing.
- The cut line is a path, always. The machine needs a vector outline to follow: the image's edge, an offset around it, or a shape you chose.
In other words, one Print Then Cut job uses both worlds at once: pixels for the printer, a path for the blade. The question is only which file you start from.
The decision, by situation
| You're starting from | Use | Why |
|---|---|---|
| A high-res PNG at the size you'll print | The PNG, as-is | Native path; nothing to convert |
| A PNG that's small, or you print at many sizes | An SVG master | Flattens sharp at any size; the PNG would blur |
| Artwork you also cut in vinyl sometimes | An SVG | One file: cut layers for vinyl, flatten for Print Then Cut |
| A design with text or thin line art | An SVG | Crisp edges survive the flatten; small raster text prints fuzzy |
| A photo | PNG | Photos are raster by nature; vectorizing fights them |
The PNG path, done right
Three things decide whether the native route looks professional or homemade:
- Resolution at final size. The blurriness people blame on Print Then Cut is usually an upscaled raster doing what upscaled rasters do. Check the pixel dimensions against the printed size; more is fine, less is not fixable in Design Space.
- A real transparent background. A white box printed around your sticker is the print version of the classic white-box problem; verify the transparency is genuine before you print a whole sheet.
- The cut line. Design Space can cut the image's edge, or you can add an offset for the sticker look. A clean-edged image gives a clean cut line; a fuzzy edge gives the machine a fuzzy path to guess at.
Where SVG earns its place
- You resize. An SVG master flattens to a razor-sharp printable image at whatever size today's project needs: 2-inch stickers now, an 8-inch iron-on sheet tomorrow, no quality lost. This is the same master-file logic as print formats generally.
- You want control of the cut line. With vector layers, the offset and the cut path are precise, which matters for kiss-cut sticker sheets and tight silhouettes.
- One design, two production modes. Crafters who sell often need the same art as a vinyl cut file and a printable; an SVG holds both futures, and a sticker workflow shows this end to end.
- Text and thin strokes. Flattened vector text prints crisp at any size; raster text only survives if it was exported large enough.
The misconception worth clearing up
A popular forum answer says Design Space "converts PNG files to vector files." It's half-true in a way that misleads: Design Space can trace an uploaded PNG to create cut paths, and that's genuinely useful for cutting solid shapes. But for the printed half of Print Then Cut, no vectorizing happens anywhere; your PNG's pixels are what gets printed. Uploading a small PNG and scaling it up in Design Space enlarges pixels, and the print shows it. If your source is too small, tracing it into a real vector first, then flattening at print size, is the route that actually fixes the blur, and only when the art is flat and shape-based enough to trace well.
What this looks like with PerfectVector
Honestly: for many Print Then Cut projects you don't need a vectorizer at all. A good PNG is a good PNG. PerfectVector enters in two specific cases. When the only copy of your design is small or soft, converting it into an SVG can rebuild suitable flat artwork as paths you can resize and inspect. And when a design lives a double life, printed some weeks and cut in vinyl others, one SVG master can preserve editable color shapes for either mode. Vectorizing and previewing are free; one credit unlocks the finished SVG. Photos and painterly art stay PNG; that boundary doesn't move.
Before you print (and cut)
- Pixel dimensions checked against the real print size.
- Transparency verified on a colored background.
- Offset or edge cut line chosen deliberately, and previewed.
- Material compatibility checked for your machine: older Explore machines are more restrictive, while newer models support additional light colors and selected Cricut specialty materials; reflective surfaces remain a sensor risk.
- For a dual-use design: the SVG master saved next to the flattened print file.
FAQ
What is the best file type for Print Then Cut on Cricut? A high-resolution PNG with a transparent background covers the standard case. Start from an SVG when you resize designs between projects, need precise offset cut lines, or use the same art for cutting and printing; it flattens into a sharp printable image at any size.
Will a Cricut cut a PNG file? Yes, two ways. In Print Then Cut, it cuts around the printed image along its edge or an offset. For plain cutting, Design Space traces the PNG into cut paths, which works well for solid, clean-edged shapes and poorly for detailed or fuzzy art.
Is PNG or SVG better for printing? The printer receives pixels either way, so what matters is resolution at print size. A PNG made at final size prints identically to a flattened SVG. The SVG wins when sizes change, because it re-flattens sharp at each new size instead of stretching old pixels.
Why does my Print Then Cut come out blurry? Often it is a resolution problem: the image was smaller than the printed size, and scaling up stretched the pixels. Also check the print settings and the source export. Replace an undersized image with a larger export, or vectorize suitable flat artwork and flatten it at the size you print. Design Space cannot add detail a small PNG does not contain.
Do I need to convert my PNG to SVG for Cricut? Not for Print Then Cut with a good PNG. Convert when you want to cut the design in vinyl, resize it freely, or rescue a small source image. Skip converting for photos and soft, painterly designs; those belong in raster.
Can I use an SVG for Print Then Cut? Yes. Design Space flattens the SVG's layers into a single printable image (the Flatten operation), prints it, and cuts around it. It's the route with the sharpest results when your design has text, thin lines, or changes size between projects.
Sources
- Cricut — How to Print Then Cut in Design Space — sensor-mark workflow, compatible printers, Flatten, bleed, and model notes.
- Cricut — Print Then Cut compatible materials — supported colors, finishes, and model-specific limitations.
- Cricut — How to upload images into Design Space — raster versus vector upload behavior and supported formats.
- W3C — SVG Coordinate Systems, Transformations and Units — why vector geometry can be rendered at a new size before printing.
Print Then Cut uses pixels for the printer and a path for the blade. Keep a good PNG when it already meets the print requirements. When suitable flat artwork also needs editable cut paths, trace and inspect an SVG version, then continue with the Cricut SVG guide.
More from the blog
SVG or PNG for Sublimation? Choose the Right Format
Sublimation presses print raster images, so PNG wins the print side. Where SVG earns its keep: the scalable design master and the matching cut file.
Make SVG Files to Sell on Etsy: A Production Guide
On Etsy, the file is what buyers review, and messy files are what get refunded. Here's how to make a clean, layered SVG cut file that's good enough to sell.