Roland CutStudio Image Trace: Get Cleaner Cut Lines
Use Roland CutStudio Image Outline, diagnose jagged or doubled contours, and decide when a cleaner imported vector gives your cutter better geometry.
On this page
Roland CutStudio can trace a raster image into cut contours, but the command does not decide which details deserve a blade path. Start with flat, high-contrast artwork, use Object > Image Outline, then inspect the result as cutter geometry. If the trace copies JPEG noise, shadows, or every small interior detail, clean the source or rebuild the logo as a simpler vector before cutting.
The important choice comes first: do you want to cut the artwork's individual shapes, or print the artwork and cut one deliberate contour around it? Those jobs need different paths. A technically successful trace can still be the wrong cut file.
The clean CutStudio trace workflow
- Decide whether the job needs artwork contours or one outer print-and-cut contour.
- Start with a sharp, flat image with clear color boundaries.
- Import the image, open Image Outline, and extract contour lines.
- Inspect double edges, holes, tiny islands, node density, and final size.
- Use an external vector route when the native trace follows noise instead of the intended shape.
- Test the smallest difficult area on the real material before the production run.
What CutStudio Image Outline actually creates
Roland describes CutStudio's vectorization tool as generating cut lines from JPG or bitmap images. Its current regional product pages list BMP, JPG, STX, AI, and EPS among supported formats (Roland DGA, Roland DG Europe). The exact compatibility can vary by build and region, so use your installed help and download page as the final check.
The official CutStudio procedure gives this basic sequence:
- Prepare a BMP, JPEG, or PNG image.
- Import the file into CutStudio.
- Select the raster and choose Object > Image Outline.
- Click Extract Contour Lines, then confirm with OK.
- Resize and position the new contours.
- Delete the source image when it is no longer needed.
That last step makes the data model clear. The imported raster is a reference. Extract Contour Lines adds vector geometry that the cutter can follow. It does not improve the pixels first, and it does not know which visible details matter to your production job.
Choose the cut before you choose the trace
Most frustrating traces begin with the wrong target.
| Intended result | Geometry you need | Common wrong result |
|---|---|---|
| Cut a solid logo or vinyl shape | Closed boundaries around the kept shapes | Noise and shadows become extra islands |
| Cut separate vinyl colors | Intentional closed shapes for each production color | JPEG edge colors become many fragments |
| Print the artwork, then cut around it | One deliberate outer contour, often with an offset | Every interior color and detail becomes a cut line |
| Draw, score, or cut a single pen line | A centerline path | Both edges of the raster stroke become a doubled outline |
CutStudio's Image Outline is an outline extractor. A thick black line has two visible edges, so an ordinary filled-shape trace can produce two boundary paths. If the job needs one line down the middle, use a centerline workflow instead. The double-cut SVG guide explains why deleting one side of an outlined shape usually leaves broken geometry.
For print-and-cut, do not assume that tracing every visible region will create the one contour you need. Build or select that outer contour deliberately, keep it separate from decorative artwork, and verify the assigned operation in your own CutStudio and cutter workflow.
Prepare the raster for a cleaner trace
Roland's Image Outline command reference says clear extraction depends on images without continuous gradients and with well-defined borders between colors. It recommends binary black-and-white images and calls photographs unsuitable for outline extraction. It also recommends useful source resolution while noting that the right resolution depends on shape complexity and cut size.
Apply that guidance before touching trace controls:
- Find the best original. A larger PNG or clean scan is a better starting point than a thumbnail copied from a website.
- Remove the background. A white rectangle, shadow, or scanner edge can become another closed contour.
- Flatten accidental color variation. JPEG halos and soft antialiasing can split one intended edge into several regions.
- Repair the silhouette. Close gaps that should be solid and remove dust or isolated pixels that should not be cut.
- Simplify for the final size. A detail that looks fine on screen may become an unweedable fragment at decal size.
- Keep a reference copy. You may need it to confirm which holes, counters, and corners were intentional.
Higher resolution is useful when it preserves a real curve or corner. It is not a cure for noise. Enlarging a compressed image gives the tracer more pixels that describe the same damaged edge.
Diagnose the trace before cleaning nodes
Zoom out to judge the silhouette, then zoom in or use the view that best exposes contours and control points in your installed version.
| Symptom | Likely cause | Better next move |
|---|---|---|
| Dozens of tiny pieces | Background texture, compression specks, shadows, or too much interior detail | Clean and simplify the raster, then retrace |
| Jagged curves | Low-resolution stair-steps or an edge with visible noise | Use a better source and reduce accidental detail |
| A thick line cuts twice | The trace followed both sides of the stroke | Use a centerline method if the job needs one path |
| Letter holes disappear | Counters merged during simplification or were too small at final size | Restore the holes and test at production scale |
| The file is hard to edit | The trace used more points than the shape needs | Retrace with a cleaner source before deleting points one by one |
| The cut is the wrong size | Trace was judged before final dimensions were set | Set physical size, then reassess small details |
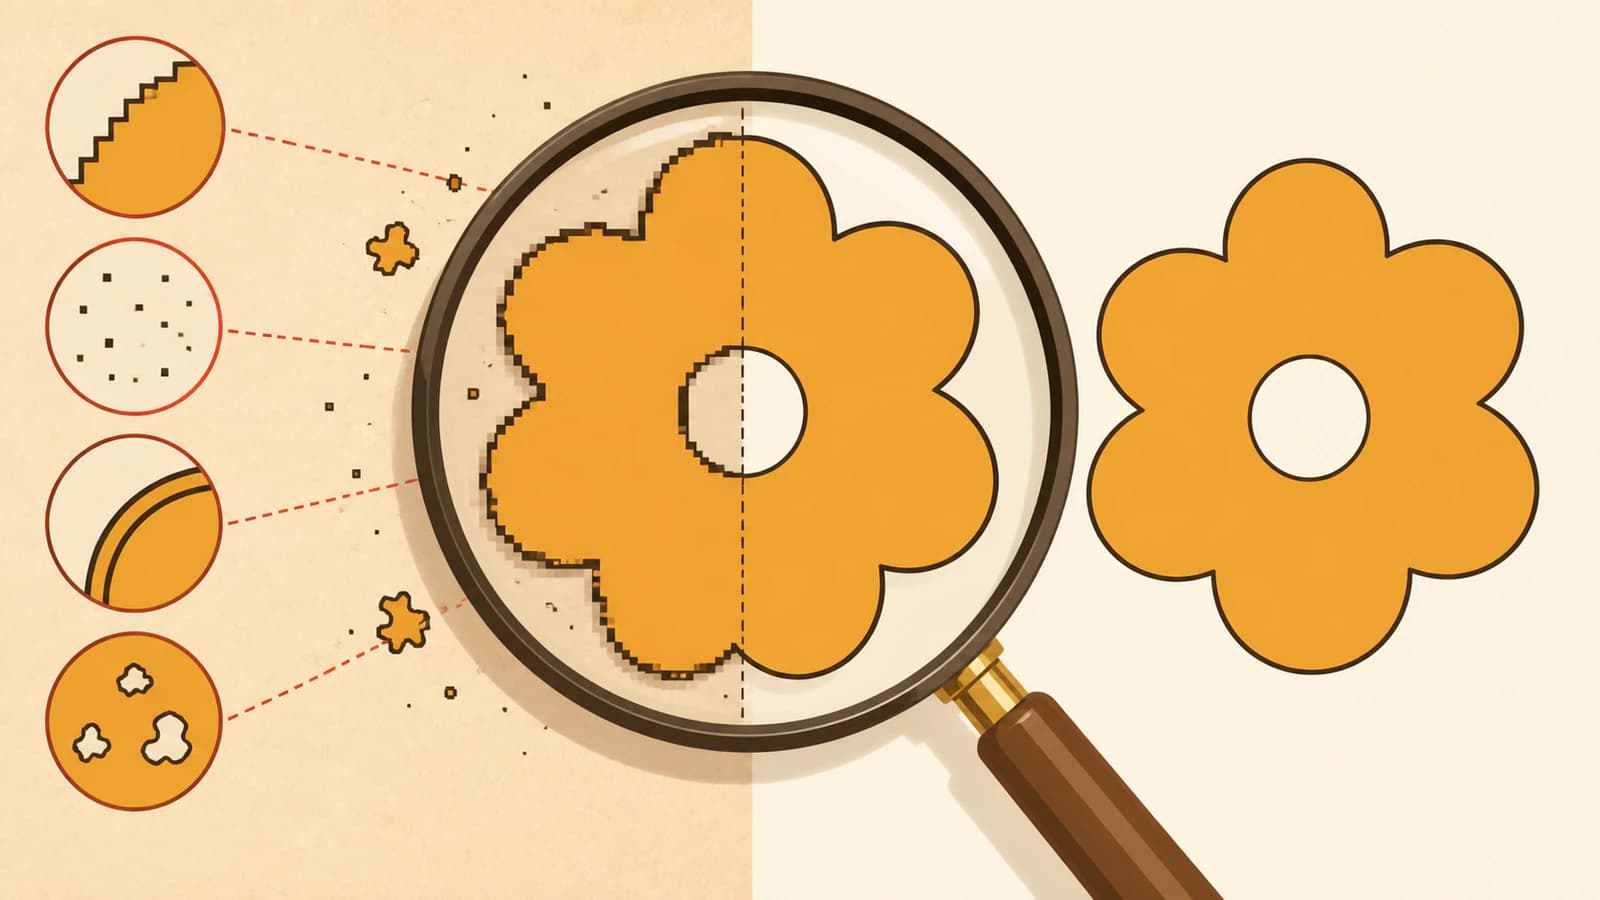
Do not begin by hand-deleting hundreds of nodes. If the contour's structure is wrong, manual cleanup is treating the symptom. Improve the source, narrow the intended cut, and retrace. Once the structure is right, remove only the points that do not change a meaningful corner, curve, or hole. The too-many-nodes guide has a fuller cleanup checklist.
When an external vector is the cleaner route
Stay with Image Outline when the source is already flat, the extracted paths need modest correction, and the cut purpose is easy to represent. An external vector route makes sense when the source is a logo or illustration but CutStudio keeps following pixel noise, soft shadows, or accidental colors.
PerfectVector fits that reconstruction branch. Upload the best logo source, inspect whether the preview produced useful closed shapes, intentional holes, and manageable geometry, then export only if the result suits the job. It is a filled-shape vectorizer, not a centerline tracer, so it is appropriate for logos, silhouettes, and layered shapes rather than single-stroke line work.
There is one important handoff detail: PerfectVector exports SVG, while the current Roland product pages cited above list BMP, JPG, STX, AI, and EPS rather than SVG. Do not rename the file extension and hope. Open the SVG in a compatible vector editor, inspect it again, then use a current CutStudio plug-in workflow or export a listed vector format that your installed build accepts. Preserve the SVG as your reusable master.
The sign-shop vector handoff guide explains how to keep editable master artwork separate from the cutter-specific delivery file. If the same artwork is headed to Mimaki's Illustrator plug-in, the FineCut image-trace workflow separates Outline Extraction, Frame Extraction, and the final cut-layer audit.
Audit cutter geometry at final size
Run this check after native tracing or external reconstruction:
- Confirm the intended operation. Artwork contours, outer contour, score line, and guide are not interchangeable.
- Set the physical dimensions. Judge holes, corners, and bridges at the size you will cut.
- Check every closed shape. Look for gaps, self-intersections, duplicate paths, and unintended overlaps.
- Preserve counters. Inspect letters such as A, B, D, O, P, and R, plus holes inside badges and icons.
- Delete impossible islands. Remove specks and details that cannot be cut, placed, or weeded reliably.
- Review node density. Keep enough points for the intended shape, but do not preserve every pixel wobble.
- Use CutStudio's production controls intentionally. Roland DG Europe's current page lists scale settings and weeding-line controls among CutStudio's features. They help prepare a good contour; they do not repair a bad one.
- Preview and test. Run a representative sample containing the tightest corner, smallest hole, and most difficult weed area.
The pre-cut SVG checklist is a useful second pass even when the paths originated in CutStudio.
When Image Outline is not the right method
- Use a centerline tracer or redraw for single-stroke drawings that should cut or score once.
- Use print-and-cut with one intentional contour for photos or full-color artwork that should retain tonal detail.
- Use a manual redraw when the only source is tiny, damaged, or ambiguous enough that automatic tracing cannot recover the original design.
- Ask the sign shop or cutter operator for its required format, color setup, minimum detail, and plug-in workflow before final delivery.
CutStudio's built-in trace is useful when the image and production goal match outline extraction. It is not a general repair tool for photographs, gradients, or unclear artwork.
FAQ
How do I trace an image in Roland CutStudio? Import a BMP, JPEG, or PNG image, select it, choose Object > Image Outline, and click Extract Contour Lines. Confirm the result, resize and position the contour, then remove the raster reference when it is no longer needed.
Why does my CutStudio trace create lots of small pieces? The source may contain compression specks, shadows, texture, soft antialiasing, or interior details that the tracer interprets as separate contours. Clean the background, reduce accidental colors, simplify the intended cut, and retrace before deleting pieces manually.
Can Roland CutStudio import SVG files directly? Current Roland product pages list BMP, JPG, STX, AI, and EPS, not SVG. Check the help for your installed build. If SVG is not supported directly, inspect the SVG in a compatible vector editor and use a current CutStudio plug-in or export a listed vector format.
Why does a line become two cut lines after tracing? An outline trace follows both visible edges of a thick raster stroke, so one drawn line becomes a narrow closed shape with two boundaries. Use centerline tracing or redraw the path when the job needs one cut, score, or pen line.
Should I use PerfectVector before CutStudio? Use it when a flat logo or illustration needs cleaner shape reconstruction than the native raster trace provides. Inspect the SVG first, then move it through a compatible editor, plug-in, or listed AI/EPS handoff. For photographs or single-stroke line art, choose another workflow.
Sources
- Roland DGA — CutStudio Software — Current first-party description of the vectorization tool and supported formats on the regional product page.
- Roland DG — CutStudio — Current European feature list, including file formats, scale settings, and weeding-line controls.
- Roland CutStudio Manual — Create contour lines for images — Official import, Image Outline, Extract Contour Lines, resize, position, and source-removal procedure.
- Roland CutStudio Manual — Image Outline command — Official source-image suitability and resolution guidance.
If CutStudio keeps tracing damage instead of design intent, reconstruct the logo as editable vector shapes, inspect the SVG, prepare the compatible handoff, and test the hardest detail before cutting the full job.
More from the blog

SignLab Vectorize Image: Trace or Import Clean SVG?
Compare SignLab's native vectorization with an imported SVG. Learn how to prepare the bitmap, inspect paths, preserve holes, and test a production-ready file.

Graphtec Studio 2 Image Trace: Fix Incomplete Paths
Fix partial traces, missing cut paths, small counters, and noisy contours in Graphtec Studio 2. Compare native tracing with a cleaner vector-first workflow.