
SVG shape-rendering crispEdges: When Does It Help?
See when SVG crispEdges helps pixel-grid marks, when it can roughen curves, and why a browser test at two sizes beats treating the rendering hint as a fix.
On this page
Use shape-rendering="crispEdges" when an SVG has deliberately hard, mostly straight edges and a test at the final display size looks better with it. Leave the default auto when the difference is negligible. On curved artwork, the hint may make an edge look rougher. It changes how a renderer draws existing shapes, not the shapes themselves. The SVG 2 specification calls it a hint and allows the renderer to reduce anti-aliasing or align some edges to device pixels.
That distinction matters if a tiny icon looks fuzzy or a logo seems jagged after export. crispEdges cannot turn an embedded PNG into paths, repair a broken contour, or promise the same pixels in every browser. Before changing the file globally, compare one representative shape with auto, crispEdges, and geometricPrecision at the sizes people will actually see.
Choose by the edge you need
- Rectangular pixel-grid art: test
crispEdgeson the relevant shapes, then check both small and larger output sizes. - Curves or round lettering: start with
auto; trygeometricPrecisionif the renderer makes a visible difference. - A gap between adjacent shapes: inspect the geometry first. A rendering hint cannot close a real hole.
- A scaled PNG inside SVG: use raster scaling controls or rebuild the artwork as paths if editability is the goal.
What crispEdges asks the renderer to do
SVG has four shape-rendering values. They are priorities, not four export formats. The default auto lets the renderer balance speed, edge contrast, and geometric accuracy. crispEdges favors strong edge contrast and may suppress anti-aliasing; geometricPrecision favors faithful geometry. MDN's SVG attribute reference explains that a renderer might treat all edges, or only near-horizontal and near-vertical edges, differently. There is no mandated sharpening filter.
| Value | What it requests | Useful first test |
|---|---|---|
auto | Renderer chooses the trade-off | Baseline for every SVG |
crispEdges | More contrast at shape edges | Square marks or grid-like details |
geometricPrecision | More faithful geometric placement | Curves, diagonals, and fine contours |
optimizeSpeed | Rendering-speed priority | Specialized contexts; do not assume a visual gain |
An attribute on a parent SVG can be inherited by its child shapes, so applying it at the root may affect a circle that should stay smooth. You can target a single rectangle or path instead. If both the SVG presentation attribute and a CSS shape-rendering declaration apply, the CSS property takes precedence.
We compared the same shapes at two sizes
We made one rectangular grid mark and one curved contour as original SVG shapes. The markup, fills, and viewBox were identical across the three columns; only the shape-rendering value changed. Each shape was rendered at 63 and 111 CSS pixels in Chromium at browser zoom 100%. The figure is a browser capture of that local test, not an illustration of an imagined result.
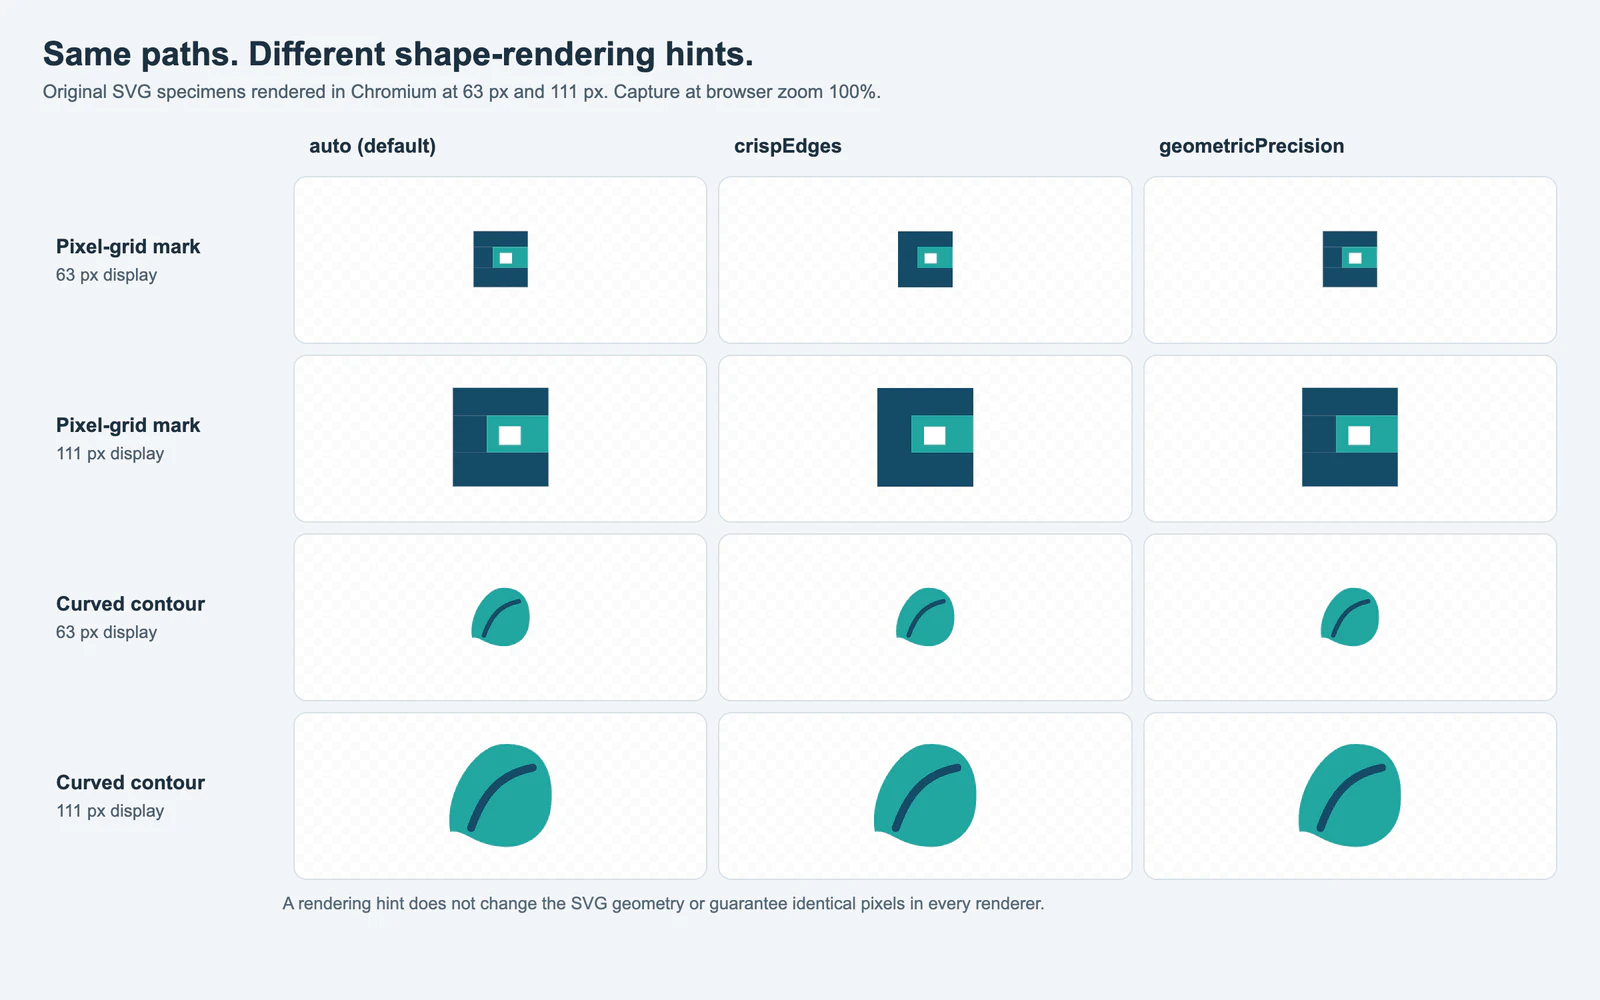
None of the modes changes the paths. In this capture, the differences are too small to declare one setting a general winner. The name sounds like a repair tool, yet the effect can be slight for a particular shape, size, and renderer. Inspect the actual destination before keeping the extra attribute.
This was one Chromium render, not a browser compatibility study. A PDF viewer, design editor, or browser at another device scale may rasterize the same paths differently. The SVG 2 definition deliberately leaves implementation choices open.
Test it on one shape before applying it everywhere
Save a copy of the SVG, then put the hint on a representative shape. For example, apply it to the rectangular part of an icon while leaving the curved detail on auto:
<svg xmlns="http://www.w3.org/2000/svg" viewBox="0 0 24 24">
  <rect x="4" y="4" width="16" height="8" fill="#154b67"
        shape-rendering="crispEdges" />
  <path d="M5 18 Q12 11 19 18" fill="none" stroke="#23a6a1"
        stroke-width="2" shape-rendering="auto" />
</svg>
Open the file in its intended viewer at a small icon size and a larger size. Compare it with the saved original, including diagonals and curves. If you are styling inline SVG with CSS, check for a rule that overrides your attribute. Remove the hint when it produces no meaningful improvement; an unnecessary property makes later display differences harder to diagnose.
Match the fix to the actual symptom
| Symptom | Check first | Better next move |
|---|---|---|
| A square mark looks soft at one size | Compare auto and crispEdges at that size | Keep the hint only if it improves the intended output |
| A circle or diagonal looks jagged | Check whether crispEdges is inherited or exported on that shape | Remove it or compare auto with geometricPrecision |
| A thin line appears between touching fills | Compare zoom, background, and path boundaries | Use the SVG seam diagnosis; repair geometry only if the gap is real |
| The file still shows square pixels when enlarged | Inspect for an embedded raster image | Use the pixelated SVG checklist instead of changing shape-rendering |
For a PNG sprite whose exact pixel grid is the design, keeping the raster can be the cleanest choice. CSS image-rendering: pixelated controls how a scaled image is sampled; that is a different property from SVG shape-rendering. The pixel-art conversion guide covers when to preserve the grid, build vector tiles, or deliberately smooth the contour.
When PerfectVector fits
If your only source is a small, flattened PNG and you need editable paths, a rendering hint cannot supply them. PerfectVector is useful at that earlier step: convert the PNG to an SVG candidate, then inspect the shapes at the size you need. Check the outline, interior holes, and small details before trying a display hint on selected paths. A trace can reinterpret pixels as geometry; it cannot decide whether a pixel-art stair step should become a smooth curve.
Keep the PNG when the original grid is the final artwork. If you already have a clean SVG and only its browser display looks odd, fix the display or geometry directly. When a flattened PNG truly needs editable contours, make an SVG candidate with PerfectVector, inspect its paths, and compare the browser render at the final size before adding crispEdges.
FAQ
Does crispEdges remove anti-aliasing from every SVG shape?
No. It asks the renderer to favor edge contrast. The specification allows different implementations, including ones that change only some near-vertical or near-horizontal edges. Test the output in the viewer you will use.
Should I put shape-rendering="crispEdges" on the whole SVG?
Only if every child shape benefits. A root-level hint can affect curved children too. Applying the attribute to one rectangular shape is easier to evaluate and less likely to roughen a curve.
Will crispEdges fix white seams or a blurry PNG inside SVG?
It cannot close a real gap or replace raster pixels with vector paths. Diagnose the seam's geometry first. For a scaled PNG, use an appropriate raster scaling method or make editable vector paths if that is the actual need.
Sources
- W3C — SVG 2 shape-rendering property — Defines the four values as renderer hints and explains their permitted trade-offs.
- MDN — SVG shape-rendering attribute — Documents applicable SVG shapes, inheritance, and CSS priority.
- MDN — CSS shape-rendering property — Describes property behavior and why curve rendering can vary.
- MDN — CSS image-rendering property — Distinguishes raster pixel scaling from rendering vector shape edges.
More from the blog

Scratch Convert to Vector: Why It Still Looks Pixelated
Scratch's Convert to Vector button changes editing mode without tracing the bitmap. Check costume points, choose a fix, and inspect an imported SVG before use.

SVG z-index Not Working? Fix Path Stacking Order
When SVG z-index does not bring a path forward, check element order. Compare the same emblem before and after a reorder, then verify groups and exported files.