
Rhino SVG Import: Choose Curves, Hatches, or Surfaces
Choose the right Rhino 8 SVG import option, check object types and holes, and decide when a raster logo needs tracing before you start modeling the design.
On this page
Rhino 8 can import SVG files directly. For filled artwork, its import dialog lets you choose Curves, Hatches, or Trimmed planes. Pick the representation your next operation needs: editable boundaries, a drafting fill, or a planar face. McNeel documents these choices in its Rhino 8 SVG import guide.
That choice matters when a logo looks correct on screen but the next modeling command cannot use the object you selected. This guide covers the import decision and the checks afterward. If your source is a PNG or JPG, tracing can recover artwork boundaries; if it is a dimensioned mechanical part, redraw the required geometry from measurements.
Choose the object you need next
A filled shape in a vector editor does not tell you which Rhino object type you want. Start with the job you plan to do after import.
| Your next task | Import choice | Check before continuing |
|---|---|---|
| Edit outlines, remove fragments, or prepare boundaries for modeling | Curves | The outer boundary and each intended opening are usable curves |
| Keep a filled graphic in a drawing | Hatches | The filled region and its openings match the design |
| Start with a flat face for later modeling | Trimmed planes | The face has the intended perimeter and holes |
The three representations are illustrated below using the same simple badge. The open center is deliberate: a circular hole makes a useful check that a filled silhouette alone would miss.
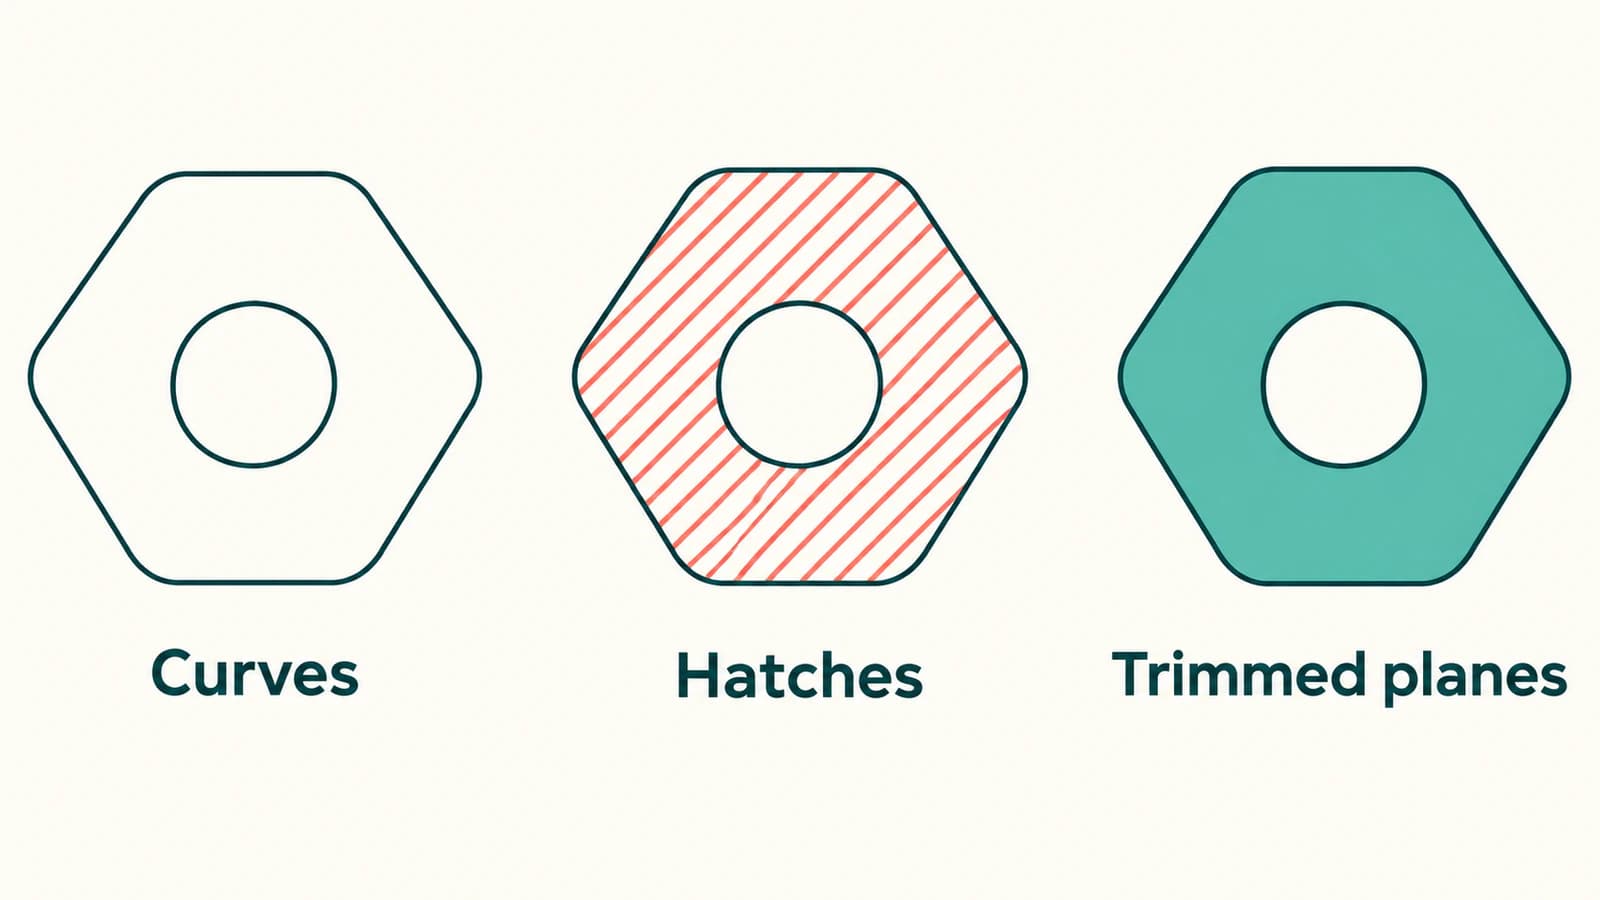
A hatch is a distinct object with fill and pattern properties. McNeel's Hatch documentation describes filling regions bounded by curves. A drafting fill can look substantial from above, so inspect the object type before treating it as modeling geometry.
A planar face also needs a separate operation to become a part with thickness. The imported face is an intermediate result. For the broader route from a flat image to a printable model, see the image-to-SVG workflow for 3D printing.
Import a small sample in Rhino 8
Keep the original SVG and work with a copy. If it contains a full sheet of artwork, make a separate sample containing one representative part, including an interior opening or other detail that must survive.
- In Rhino 8, choose File > Import, select the SVG, and open it.
- Set Import filled objects as to the representation you need.
- Review grouping separately. Retain grouping preserves source groups; Group multi curve paths groups a multiple-path object.
- Complete the import and inspect the sample before bringing in the whole design.
Those settings come from the documented SVG import options. A group organizes selection; it does not, by itself, join its members into a continuous modeling boundary.
If the options dialog no longer appears, use the Options button in the import file dialog to revisit saved settings. Keep the discussion tied to your installed Rhino version: an older forum answer recommending a format conversion is not a reason to skip Rhino 8's documented SVG importer.
Inspect geometry before trusting the preview
Select an imported object and run What. Rhino reports details about the selected object, including its type; the same information is available through Details in Properties. This is the documented object inspection command.
Use that report together with three visual checks. They answer different questions, so a pass on one does not replace the others.
Check the badge's outer edge and opening
For a badge with one circular opening, inspect both the outside perimeter and the circle. If the center appears white, establish whether it is an opening or a separate white object covering another region. Move a copy aside or temporarily hide the suspected covering object to understand the structure; undo the diagnostic change afterward.
With curve input, examine the boundaries you intend to use. With a hatch or face, inspect the filled area around the opening. Do not accept a filled-in opening simply because the outer silhouette looks right.
If your next operation needs curves but the import produced a hatch or surface, you have two practical routes: reimport the sample as curves, or preserve the original and use DupBorder to obtain boundary curves from supported objects. McNeel lists hatches and open surfaces among DupBorder's supported inputs.
Check one known dimension
Choose a feature whose intended size you know, such as the full badge width. Measure it in the model and compare it with that target. A visually plausible badge can still be the wrong physical size.
Correct a scale mismatch before adding thickness, fitting another component, or placing several copies. The SVG import sizing checks explain how to separate a consistent scale error from a geometry problem. Tracing an image also does not establish manufacturing tolerances; use measured geometry where fit matters.
Try the next operation on the sample
Perform the operation the real job needs on a copy of the imported sample. For boundary editing, confirm you can select and modify the intended curve. For modeling, verify the resulting geometry and opening after the operation, including a side view where thickness is visible.
A successful import is only the first acceptance condition. If the geometry arrives but will not form the intended profile, continue with the SVG extrusion troubleshooting checks for gaps, overlaps, and unintended regions. Avoid changing every export setting at once; keep a copy of each meaningful revision so you can identify which change affected the result.
When your source is a PNG or JPG
If you only need an image as a reference, Rhino's Picture command may be enough. It creates a rectangular surface carrying the image as a material, according to the Picture documentation. The surface follows the picture rectangle. It does not trace the logo's perimeter or cut out its internal lettering.
If you need to reuse a raster emblem as editable boundaries, prepare the image as an SVG with PerfectVector. Start with a clear, flat source, inspect the vector preview for unwanted background regions and missing details, then download the SVG and import a sample into Rhino. Check its object type, opening, and known dimension before modeling further. PerfectVector handles the image-to-vector step; those Rhino checks determine whether the result suits your part.
A photograph with shading is a poor starting point for a precise mechanical outline. For a mounting hole, mating edge, or dimensioned component, use the image as a reference and construct the geometry from measurements. For decorative artwork, compare tracing with a manual redraw of the few features that need especially clean control. The image vectorization primer explains what the conversion reconstructs.
FAQ
Can Rhino read an SVG without converting it to PDF? Yes. Rhino 8 supports direct SVG import. Choose the object representation for your next task and verify the result.
How can I tell what kind of object was imported? Select an object and run What, or open Details in Properties. Read the object description, then check the geometry itself. Its visible color or fill alone does not establish whether it is suitable for your next operation.
Does retaining groups join the curves? Grouping controls which objects are organized and selected together. It does not establish that their endpoints form the continuous boundary your modeling operation requires. Inspect the members and the intended opening separately.
Can I turn a PNG logo into a Rhino solid by importing it? A raster image can serve as a visual reference. To model its silhouette, recover or redraw the boundaries, verify them in Rhino, and perform the separate modeling operation that creates thickness. Check the final geometry and dimensions before using the part.
Sources
- McNeel — Rhino 8 SVG import/export — Native import, filled-object choices, and grouping options.
- McNeel — Hatch — Regions and hatch properties.
- McNeel — What — Inspecting object descriptions and geometry details.
- McNeel — DupBorder — Obtaining curves from supported object boundaries.
- McNeel — Picture — Placing an image on a rectangular surface.
Choose the representation for your next Rhino operation, then verify one sample's type, opening, and size. If the missing step is turning a raster emblem into boundaries, convert the artwork to SVG and run those same checks on the imported result.
More from the blog

Tinkercad SVG Import: Turn 2D Paths Into 3D Shapes
Prepare an SVG for Tinkercad, set its size, and check filled regions, holes, and height. Fix import errors before treating the extrusion as a printable model.

OpenSCAD SVG Import: Build a Measured, Extrudable Shape
Import SVG geometry into OpenSCAD, check holes and dimensions, then extrude a measured shape. Learn why a white center may need repair to become a real hole.