Image to SVG for Brother ScanNCut: Clean Cut Paths
Convert an image to SVG for Brother ScanNCut. Compare CanvasWorkspace tracing with a clean external SVG, then check colors, paths, size, FCM, and preview.
On this page
- Native trace or external SVG: the quick choice
- Route 1: trace the image in CanvasWorkspace
- Route 2: prepare a clean SVG before import
- Audit the same source before FCM transfer
- 1. Restore and organize color regions
- 2. Follow every contour and hole
- 3. Diagnose lines that would cut twice
- 4. Check path density and tiny pieces
- 5. Confirm physical size after import
- 6. Create and transfer the FCM file
- 7. Inspect the machine preview and test the cut
- Common failures and the next check
- Where PerfectVector fits
- When another workflow is better
- Final ScanNCut checklist
- FAQ
- Sources
To convert an image to SVG for Brother ScanNCut, choose between tracing the raster inside CanvasWorkspace and importing an SVG prepared elsewhere. Use CanvasWorkspace Image Tracing for simple, high-contrast art when the native result is easy to inspect. Prepare an external SVG when you want to clean the source, compare vector shapes before import, or reduce unwanted detail earlier.
Both routes lead to the same checks. Before you transfer FCM to the machine, inspect colors, closed contours, doubled outlines, path density, physical size, and the machine preview. Then make a small test cut in the intended material.
The short answer
- Use CanvasWorkspace Image Tracing for a clear PNG or JPG when the first trace produces understandable cutting lines.
- Import a cleaned SVG when the native trace adds noise, doubled contours, fragmented colors, or awkward paths.
- Keep the raster workflow for a photograph or shaded image that should be printed rather than reduced to cut shapes.
- Whichever route you use, CanvasWorkspace handles the SVG-to-FCM handoff. Your machine and material still need a preview and test cut.
Native trace or external SVG: the quick choice
Brother's CanvasWorkspace reference documents two relevant paths. Its import tool accepts vector shapes such as SVG, while Image Tracing turns common raster images into cutting lines. The choice depends on the source and on how easy the traced geometry is to inspect.
| Source or situation | Better first route | Why |
|---|---|---|
| Bold silhouette or simple one-color icon | CanvasWorkspace trace | Fast to test in the destination workspace |
| Flat multicolor badge or paper-layer design | Try both | Compare how each route separates useful regions |
| Noisy screenshot or compressed JPG | Clean SVG first | Remove background noise and color fragments before import |
| Thick hand-drawn lines meant to cut once | Centerline or redraw workflow | Ordinary outline tracing may create two cut boundaries |
| Photograph or shaded portrait | Keep as raster or simplify first | Cut paths cannot preserve continuous tone |
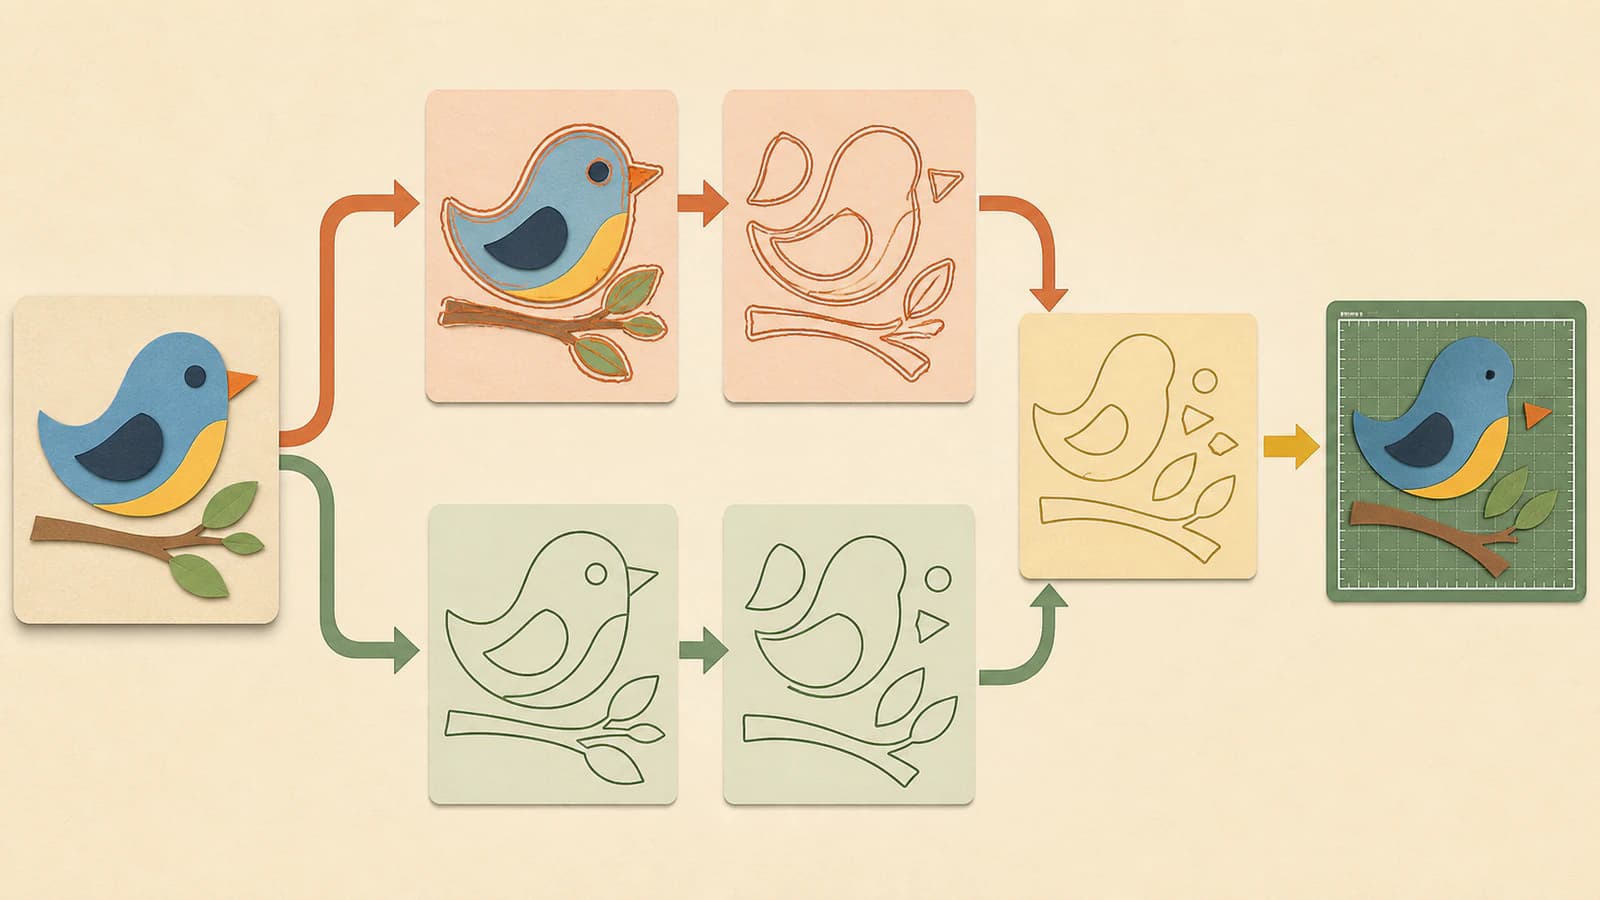
Run the same source through both routes when the first result is uncertain. Choose the file whose shapes are easier to understand and prepare, not the one with the smoother thumbnail.
Route 1: trace the image in CanvasWorkspace
CanvasWorkspace can trace JPG, GIF, BMP, and PNG images into cutting lines, according to Brother's current documentation. This native route keeps the import, trace, editing, and FCM stages in one application.
A practical native workflow is:
- Start with the sharpest copy of the image you have.
- Crop unrelated objects and remove an unwanted background.
- Import the raster through Image Tracing.
- Adjust the trace until the intended shapes appear without obvious specks or gaps.
- Move or hide the source image so you can inspect only the generated cutting lines.
- Check the layers and outline at high zoom before continuing.
The native route is sensible when the trace stays simple. If every shadow becomes a separate shape, a thick line gains two boundaries, or small noise turns into many pieces, stop adjusting and compare an external conversion. More tracing effort does not always make the underlying source a better cut design.
Route 2: prepare a clean SVG before import
The external route moves vector preparation earlier. Convert the raster, inspect the SVG in a vector-aware preview or editor, remove unwanted geometry, and then import that file into CanvasWorkspace.
This route is useful when:
- you need to compare the vector with the original before opening CanvasWorkspace;
- a background or compression noise creates many small shapes;
- the design has several colors that need deliberate separation;
- the same SVG must remain editable outside the ScanNCut workflow;
- the native trace is hard to diagnose.
An .svg extension does not guarantee good cut paths. The file still needs shapes that match the job. Before import, confirm that intended regions have usable boundaries, the background is gone unless it is part of the design, and thin lines use the geometry you actually want the blade to follow.
Audit the same source before FCM transfer
Put both results through the same audit. A file that looks fine at normal zoom still needs a structural check before it is ready for a test cut.
1. Restore and organize color regions
Color is useful for identifying pieces even when the machine ultimately follows paths. Check that every intended color region still exists and that overlapping pieces have not hidden each other.
A current creator workflow reports that imported SVG pieces may appear black or stacked and then need recoloring or separation in the Layers panel. Treat that as a symptom to check, not behavior every version must reproduce. What matters is whether you can identify, position, and export the pieces you intend to cut. Julie Ebersole's ScanNCut walkthrough shows this recolor-and-layer workflow.
2. Follow every contour and hole
Trace each intended boundary with your eye. Look for an open gap, an accidental overlap, a filled counter inside a letter, or a tiny loose region. A closed shape is useful when you need the machine to cut around a filled area. An intentionally open draw or score line should remain open.
Do not repair a hole by merely coloring it white. Confirm that the vector structure preserves the empty region you want. When the file is complex, hide pieces one at a time and check what remains.
3. Diagnose lines that would cut twice
A thick line in a raster image has two visible edges. Filled-region tracing often follows both edges and turns one drawn line into a narrow outlined shape. The blade then has two boundaries to follow.
If the design should cut, draw, or score one path down the middle, use a centerline method or redraw the line. If it should cut out the full thick shape, the two outer boundaries may be correct. The double-line SVG guide explains how to tell those cases apart.
4. Check path density and tiny pieces
Zoom into curves and corners. A useful trace keeps enough points to describe the art without following every pixel wobble. Remove dust specks, isolated fragments, and color slivers that do not belong in the job.
There is no universal node limit that makes a ScanNCut file good. Judge whether the design remains editable, whether the intended curves stay smooth, and whether every small piece has a production purpose. If the path is difficult to inspect, use the too-many-nodes checklist before simplifying it aggressively.
5. Confirm physical size after import
Group the design temporarily when you need to resize all pieces together, then measure one known dimension. Do not assume that pixel dimensions or a correct-looking preview equal the intended inches or millimeters.
Check width, height, placement, and the usable area for your mat and model. If the size changed somewhere in the workflow, correct it deliberately with the wrong-size SVG checklist rather than dragging until it looks close.
6. Create and transfer the FCM file
Brother distinguishes SVG as an import format from FCM data that the cutting machine can read directly. A current third-party walkthrough shows the usual forward sequence: import SVG, edit or group pieces, then download or transfer FCM from CanvasWorkspace. The tutorial covers both web and desktop routes.
Brother's official FCM transfer page lists wireless network, USB flash drive, and USB cable routes, while noting that availability varies by model. Use the method documented for your machine rather than assuming every connection option is present.
7. Inspect the machine preview and test the cut
Open the transferred FCM on the ScanNCut and use the layout or preview available on your model. Confirm that the intended shapes are present, the placement and size make sense, and no stray contour appears outside the design.
Then test a small version or a representative detail on scrap material. Vector geometry does not choose blade condition, pressure, speed, mat grip, or material behavior. The test cut is where you verify that the prepared paths and physical setup work together.
Common failures and the next check
| What you see | Likely issue | Next check |
|---|---|---|
| CanvasWorkspace shows ErrS09 | The pattern could not be imported | Confirm the file is SVG, DXF, or FCM as listed in Brother's ErrS09 guidance; then retry with a genuinely traced, simplified SVG |
| All pieces look black or hard to distinguish | Imported color display or stacked layers | Inspect the Layers panel and restore useful fill or line colors |
| One drawn line would cut twice | Outline trace captured both edges | Use centerline geometry or redraw one intended path |
| Design arrives at the wrong size | Dimensions changed between applications | Group, measure, and set a known final dimension |
| Tiny dots appear in the preview | Dust, compression, or background noise became shapes | Delete stray regions or clean the source and retrace |
| Photo turns into patchy blobs | Continuous tone was forced into cut regions | Keep a print workflow or simplify the image into flat art first |
ErrS09 is a useful starting point, not a complete structural diagnosis. Brother's page confirms that the data could not be imported and lists supported formats. It does not document every reason a nominal SVG might fail, so avoid guessing at one universal cause.
Where PerfectVector fits
PerfectVector fits before CanvasWorkspace. Upload a suitable flat image to the image-to-vector tool, inspect the reconstructed shapes, and download the SVG. Then bring that SVG into CanvasWorkspace and run the same color, contour, double-line, node, and size audit.
Use this route when you want an inspectable SVG before the FCM stage. It does not replace CanvasWorkspace Image Tracing when the native result is already simple, and it does not create FCM, control the machine, or choose cut settings.
When another workflow is better
- Use the original SVG when the designer or marketplace supplied one. Retracing a raster preview usually loses useful structure.
- Keep photographs and shaded artwork in a print-oriented workflow unless you deliberately simplify them into flat cut regions.
- Use a centerline or drawing workflow for single-stroke art that should not become a filled outline.
- Redraw exact lettering or intricate logos when automatic tracing changes important shapes.
- Start from a cleaner source when the only image is tiny, blurred, or heavily compressed.
The broader cut-file preflight is useful when you also need to review licensing, file bundles, hidden objects, and material-fit questions before a project reaches the mat.
Final ScanNCut checklist
- The source image suits vector cutting rather than continuous-tone printing.
- Native trace and external SVG were compared when the first result was uncertain.
- Intended colors and pieces are easy to identify.
- Closed cut regions are complete and real holes remain empty.
- Single lines have not become accidental doubled outlines.
- Stray shapes and needless path detail are gone.
- Imported width and height match the project.
- The design was exported or transferred as FCM through a route supported by the machine model.
- The machine preview contains only the intended shapes.
- A representative scrap test passes before the final material is used.
FAQ
Can CanvasWorkspace trace a PNG or JPG for ScanNCut? Yes. Brother documents Image Tracing for JPG, GIF, BMP, and PNG images. The function creates cutting lines from the raster. Inspect the result for noise, gaps, doubled contours, and unwanted background shapes before exporting FCM.
Does Brother ScanNCut use SVG or FCM? CanvasWorkspace can import SVG, while Brother describes FCM as data the cutting machine can read directly. Use SVG as the editable vector handoff, then create or transfer FCM through CanvasWorkspace for the machine.
Is CanvasWorkspace Image Tracing better than an external SVG converter? Not for every source. Native tracing is convenient for simple art that produces clear cutting lines. An external SVG is useful when you want to clean the source, inspect the vector first, or compare path structure. Judge both with the same contour, color, node, size, and preview checks.
Why does one line cut twice after tracing? The trace may have followed both edges of a thick raster line, creating a narrow outlined shape. Use centerline geometry when you want one drawn, scored, or cut path. Keep the outline only when the whole thick shape is meant to be cut out.
What should I check when CanvasWorkspace shows ErrS09? Brother defines ErrS09 as a pattern that could not be imported and lists SVG, DXF, and FCM as supported formats on its help page. Confirm the format first. If the file is SVG, recreate it as a real, simplified vector trace and retry instead of assuming the extension alone makes it importable.
Sources
- Brother Support — About CanvasWorkspace — Documents raster Image Tracing, SVG/FCM/DXF import, editing tools, and the FCM machine handoff.
- Brother CanvasWorkspace — How to transfer the FCM file — Lists wireless, USB flash drive, and USB cable transfer routes and notes model variation.
- Brother Support — ErrS09 — Defines the import error and lists SVG, DXF, and FCM as supported formats.
- Printable Cuttable Creatables — How to Use SVG Files with Brother ScanNCut — Shows the CanvasWorkspace SVG import, grouping, FCM download, and transfer workflow.
- Julie Ebersole — Using SVG Cut Files with the Brother ScanNCut — Provides a current creator workflow for size checks, color restoration, layer organization, and FCM export.
Have an image ready for ScanNCut? Convert it to SVG, inspect the paths, then import it into CanvasWorkspace and approve the FCM only after the machine preview and a small test cut look right.
More from the blog

SignLab Vectorize Image: Trace or Import Clean SVG?
Compare SignLab's native vectorization with an imported SVG. Learn how to prepare the bitmap, inspect paths, preserve holes, and test a production-ready file.

Roland CutStudio Image Trace: Get Cleaner Cut Lines
Use Roland CutStudio Image Outline, diagnose jagged or doubled contours, and decide when a cleaner imported vector gives your cutter better geometry.