Blender Trace Image to Grease Pencil: Choose Your Route
Trace an image to Grease Pencil in Blender, fix missing commands and dense strokes, or prepare a color SVG for import. Choose the route your drawing needs.
On this page
- Trace an image or import an SVG?
- How to trace an image to Grease Pencil in Blender
- 1. Prepare a black-and-white working copy
- 2. Add an Image Empty and select it
- 3. Run the image trace
- 4. Adjust the control that matches the defect
- Why the trace command is missing or the result looks wrong
- Import prepared color SVG artwork as Grease Pencil
- What this looks like with PerfectVector
- Check the drawing before you animate it
- FAQ
- Sources
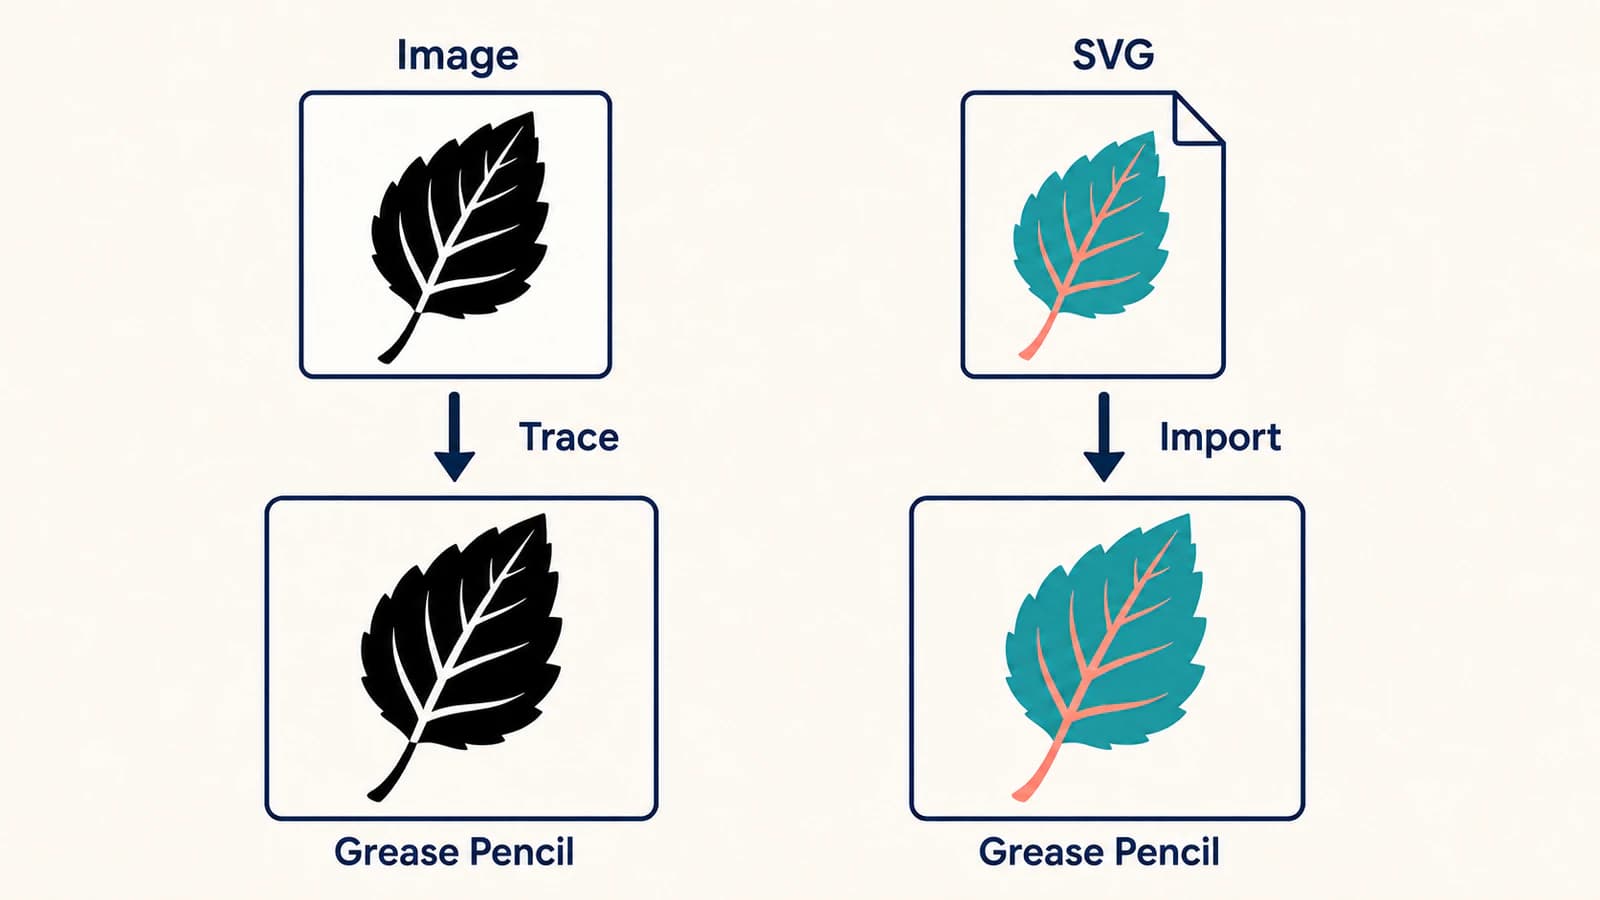
Blender's Trace Image to Grease Pencil starts with an Image Empty and creates a drawing from black-and-white image content. If you load the picture as a mesh plane, or expect the tracer to reproduce a colored illustration, you're starting with the wrong route. Blender also has a separate SVG as Grease Pencil importer for artwork you've already prepared as vectors. The native trace manual and SVG import manual document those two operations separately.
Choose the source route before adjusting settings. A dark ink drawing needs a different preparation pass from a flat color character, and neither import is a finished animation.
Choose the route first
- Black-and-white drawing: add it as an Image Empty, select it in Object Mode, then use Object → Convert → Trace Image to Grease Pencil.
- Prepared color SVG: use File → Import → SVG as Grease Pencil, then inspect the imported shapes and materials.
- Missing trace command: check the selected object type and mode before installing an add-on.
- Dense or noisy result: clean the source and test a smaller working copy before adding more detail.
Trace an image or import an SVG?
The practical difference is where you decide the shapes. Native tracing interprets pixels in Blender. With SVG import, you prepare vector artwork first and then check how Blender imports it.
| What you have | Route to try | What to inspect first |
|---|---|---|
| Clean black ink on white paper | Native Trace Image to Grease Pencil | Thin lines, gaps, specks, and the background |
| A colored PNG that can become a monochrome drawing | Prepare a black-and-white copy, then trace | Which colors merge or disappear in the copy |
| A flat color illustration that needs separate vector shapes | Prepare an SVG, then import it as Grease Pencil | Shape boundaries, overlaps, materials, and scale |
| An SVG already containing the artwork you need | Import that SVG directly | Whether the imported drawing matches the source |
| A photograph or shaded painting whose texture matters | Keep it as a reference and choose what to redraw | Which details actually need editable geometry |
This is a route decision, not a promise that every SVG feature will import unchanged. Blender's SVG import page lists import controls but does not provide a blanket guarantee for arbitrary colors, fills, gradients, or effects. Test one representative drawing before preparing a whole set.
How to trace an image to Grease Pencil in Blender
These steps follow the Blender manual checked on September 8, 2026. It was labeled Blender 5.2 LTS. If you're following an older video, use the manual matching your installed version when a label or menu differs.
1. Prepare a black-and-white working copy
Start with one drawing that has both a broad dark shape and a thin detail you want to keep. Save the original, then prepare a separate copy for tracing. Remove paper shadows and obvious dust, make the background consistent, and decide which pale marks belong in the drawing.
Blender can convert a color source internally, but its manual recommends doing the black-and-white preparation yourself. That gives you a chance to see whether two adjacent colors become indistinguishable before the trace. The same manual advises keeping the image resolution small enough to avoid unnecessarily dense strokes. Blender's image tracing documentation is the reference for both recommendations.
Don't reduce the image until fine lines break. Keep a clean master and compare a smaller working copy against it. The useful question is whether the smallest important gap and thinnest intended mark remain visible, not whether the file has the largest possible pixel dimensions.
For source cleanup beyond this Blender workflow, the line art to SVG guide explains the common problems with pencil texture, paper backgrounds, and outlined strokes.
2. Add an Image Empty and select it
Load the picture as an Image Empty, using an image Reference or Background object. Then select that image object in Object Mode.
Seeing the picture somewhere in Blender is not enough. Opening it in an image editor does not establish the selected source object for this operation. A textured mesh plane is also a different object. Blender's Convert documentation separates image tracing, mesh-plane conversion, and conversion of existing curves or meshes to Grease Pencil.
If you already made a plane from the image, return to the source file and add an Image Empty for tracing. Converting the plane to Grease Pencil takes you through an existing-geometry conversion, not the documented image-tracing workflow.
3. Run the image trace
Choose Object → Convert → Trace Image to Grease Pencil. For your first comparison, set Target Object to New Object so the image remains available beside the result. Selected Object replaces the Image Empty, according to the current trace manual.
Use Single for an individual drawing. Start with the default trace, inspect it against the source, and change one control at a time. You need to know whether a change repaired the thin detail or merely made the whole drawing look heavier.
4. Adjust the control that matches the defect
The current trace operator uses Radius for generated stroke thickness. Color Threshold sets the luminance threshold, while Turn Policy resolves ambiguous path connections. These are different jobs; increasing stroke radius is not a substitute for separating the foreground from the background. The trace manual describes each control.
| What you see | Check or change | Compare afterward |
|---|---|---|
| Pale intended marks disappear, or gray background enters the drawing | Source contrast and Color Threshold | The same thin line and nearby empty background |
| The drawing's strokes look too heavy or too light | Radius | Small gaps as well as overall appearance |
| Connections form on the wrong side of a tight junction | Turn Policy | The affected junction, without assuming the whole drawing is fixed |
| Many tiny fragments surround the drawing | Dust, texture, and source resolution | Stray marks after a new trace of the cleaned copy |
| Too much detail makes the drawing awkward to edit | A smaller source copy or simpler artwork | The silhouette and the details you intended to retain |
Black and White turn policies prioritize foreground and background connections respectively. Treat that as a targeted test for ambiguous connections. It is not a universal black-square repair or a background-removal button.
Why the trace command is missing or the result looks wrong
A missing command and a poor trace need different checks. For the command, confirm Object Mode → selected Image Empty → image trace operation. For a visible but poor result, compare the source and the trace before changing the route.
A useful check is to trace a tiny, simple black shape on a plain white background. If that gives you a usable starting drawing but your original does not, return to the original's contrast, background, and detail. If the operation is still unavailable, match the manual to your Blender version and confirm the source object type again.
Avoid copying every setting from a years-old tutorial. In the current manual, image tracing uses Radius. The separate generic conversion of existing geometry to Grease Pencil has a Thickness setting. A familiar label on the wrong operator can lead you away from the image workflow.
A black block, disappearing detail, or excess background is a reason to inspect the input and threshold decision. Change one thing, rerun, and compare the same area. If adjusting a connection policy fixes one corner but damages another, the source may need a clearer separation there.
Import prepared color SVG artwork as Grease Pencil
Use this route when you want to prepare the vector shapes before they reach Blender, especially for a simple color drawing. If you already have a suitable SVG, start with that file. There is no reason to rasterize and retrace it first.
- Inspect the SVG in your vector editor. Check the silhouette, holes, overlaps, stray shapes, and any background rectangle. Keep a simple test file so a complex illustration does not hide an import problem.
- Choose File → Import → SVG as Grease Pencil. Confirm that the menu names Grease Pencil; SVG as Curves is a separate destination.
- Set the import scale deliberately. The importer provides Scale, Scene Unit, and Center on Bounds controls. Scene Unit applies the scene's unit scale; Center on Bounds centers the imported artwork on its bounding box.
- Check import Resolution. Here it controls generated stroke resolution. It is a different setting from the pixel resolution of a raster source used for native tracing.
- Compare the imported drawing with the source. Look at the silhouette, inner holes, overlapping shapes, colors or materials, size, and placement. Resolve differences on the small test before repeating the process.
Those menu and control descriptions come from Blender's SVG as Grease Pencil manual. Its later Fill, Sampling, and Uniform Width options describe exporting, so don't look for them as import fixes.
If the SVG already contains more detail than you need, simplify it before the handoff. The guide to SVGs with too many nodes helps you inspect path complexity without treating a smaller node count as proof that every detail survived.
What this looks like with PerfectVector
If your starting point is a flat colored PNG or JPG and you need SVG shapes for the import route, use PerfectVector's image to vector converter to prepare a candidate SVG. Inspect its silhouette, small gaps, overlapping colors, and background before downloading it. Then import that file as Grease Pencil and compare those same details in Blender. For a black-and-white drawing that already suits Blender's native tracer, start directly in Blender.
The useful checkpoint is the imported drawing you can work with. A pleasing SVG preview alone does not establish that its shapes, materials, or scale suit your Blender scene.
Check the drawing before you animate it
Keep this first review small: one drawing, one intended camera view, and a short list of details that must survive.
- Compare the outer silhouette and a thin internal detail against the source.
- Check whether holes remain open and overlapping shapes appear in the intended order.
- Inspect the background and delete unintended artwork only after confirming what it is.
- Confirm scale and placement in the scene where you'll use the drawing.
- Decide how the drawing needs to be organized for your next editing or animation step.
A trace gives you a starting drawing. Don't assume it has the layer organization, rig, or motion your project needs. The native tracer also offers Sequence mode for an image sequence; that is not a claim that one still image automatically becomes animated. Test a single frame first, then use the sequence controls documented for your version.
If your actual requirement is one path down the center of every drawn line, define that separately before accepting the result. A picture that looks correct can still have the wrong path structure for the next tool. The single-line SVG guide explains that distinction for line-following workflows.
FAQ
Why is Trace Image to Grease Pencil missing? Check that you're in Object Mode with an Image Empty selected. A picture loaded as a mesh plane is a different object. Use the manual for your installed Blender version to confirm the menu path and control names.
Can Blender trace a color image to Grease Pencil? The native image tracer works in black and white and converts a color image internally. Prepare a black-and-white copy if that is the drawing you want. For prepared color vector artwork, try SVG as Grease Pencil and inspect the imported shapes and materials.
Why does the trace have so many strokes or tiny fragments? Inspect the source for texture, dust, gray background, and excessive detail. Blender's manual recommends avoiding unnecessarily high image resolution because it produces dense strokes. Test a cleaned, smaller copy while checking that important thin marks remain visible.
Which setting controls trace thickness? The current image-trace manual calls it Radius. Thickness appears on a separate conversion operator for existing geometry. Match both the Blender version and the operation before following a tutorial's settings.
Does importing an SVG create a finished Grease Pencil animation? No. Treat the import as a source drawing that still needs inspection and organization for your project. Confirm its shapes, materials, size, and placement before adding your animation work.
Sources
- Blender — Trace Image to Grease Pencil — Documents the Image Empty source, black-and-white tracing, source-resolution advice, and trace controls.
- Blender — SVG as Grease Pencil — Documents the SVG import route and separates its controls from SVG export options.
- Blender — Convert — Distinguishes image tracing from conversion of existing geometry and image-to-mesh-plane operations.
Have a flat colored image you want to prepare for Blender? Convert your own image to an SVG, inspect the small gaps and color boundaries, then import one drawing as Grease Pencil and compare it with the source before preparing the rest.
More from the blog

OpenToonz Raster to Vector: Choose a Conversion Mode
Convert selected OpenToonz drawings into vector levels. Choose Centerline or Outline, inspect stroke structure, and understand where PLI and SVG files fit.

Can ibisPaint Vectorize an Image? Vector Layers vs Real SVG
Learn what ibisPaint Vector Layers can do, why they do not auto-trace a raster image, and how to turn suitable PNG or JPG artwork into a portable SVG.