Image to SVG for Siser Leonardo: A Clean Cut File
Turn a PNG or JPG into a clean SVG for Siser Leonardo, inspect paths and colors, import it at the intended size, and run a material-specific test cut.
On this page
- First decide: cut paths or printed pixels?
- Choose source artwork that can become sensible paths
- Understand what the SVG stores
- Convert the image into editable shapes
- Inspect path structure, not just appearance
- Close intended cut contours
- Preserve holes as holes
- Remove doubled contours
- Reduce unnecessary nodes
- Organize colors around the material job
- Establish size before and after import
- Import into Leonardo Design Studio
- Set up the cut in the destination workflow
- Diagnose common import and cut problems
- Keep a reusable master
- FAQ
- Sources
To turn an image into a usable SVG for Siser Leonardo, start with flat artwork that has clear color boundaries, reconstruct those regions as vector paths, and inspect the file before import. Remove background shapes, simplify rough curves, close intended cut contours, separate colors deliberately, and verify the design's physical size. Then import the SVG into Leonardo Design Studio and run a small test with the actual material and machine settings.
The conversion creates geometry. It does not decide how many material layers you want, which shapes should be weeded together, whether heat-transfer vinyl should be mirrored, or which blade and cut settings suit your job.
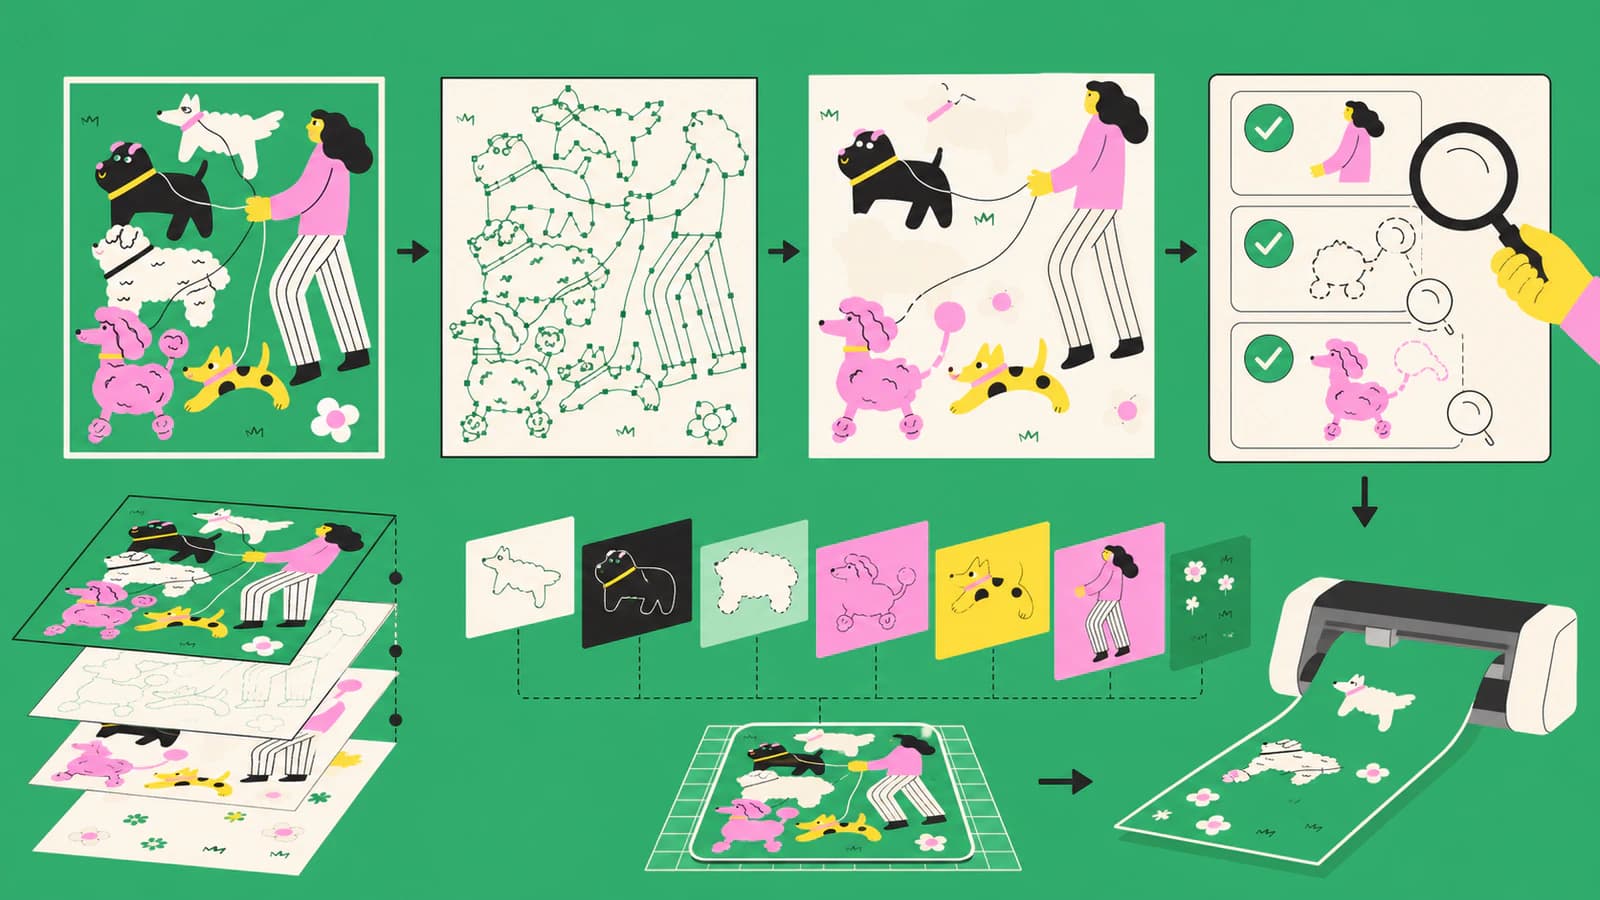
The clean-file route
- Decide whether the job needs vector cut paths or a raster print image.
- Prepare the largest, cleanest version of the artwork.
- Convert only the shapes you intend to cut.
- Inspect closed paths, holes, overlaps, nodes, and color groups.
- Set a known width or height before import.
- Import the SVG, confirm the layers and size, then test-cut the real material.
First decide: cut paths or printed pixels?
Siser's official introduction to Leonardo Design Studio documents imports for SVG, PNG, and JPG files. That does not make the formats interchangeable.
Use SVG when the machine needs scalable path boundaries for shapes, lettering, or color-separated pieces. A vector file can expose editable nodes and closed contours, which makes it the stronger handoff for ordinary cut vinyl, heat-transfer vinyl, cardstock, and similar shape-driven work.
Keep PNG or JPG when the artwork is meant to remain a printed image in a print-then-cut workflow. A photograph with hundreds of tones usually becomes a stylized poster if traced into vectors. Converting every pixel boundary into a path will not preserve the photograph more faithfully.
Ask one question before converting: Does this artwork need to be cut as shapes, or printed as pixels and then cut around a boundary? The answer determines the file you should prepare.
Choose source artwork that can become sensible paths
The best automatic candidates are already graphic:
- one-color silhouettes;
- simple logos and badges;
- flat illustrations with distinct color regions;
- bold line art;
- high-resolution PNGs with transparent backgrounds.
More difficult sources include tiny JPEGs, compressed screenshots, shadows, glows, soft watercolor edges, distressed texture, and lettering whose font must remain exact. A trace can approximate what those pixels show, but it cannot recover the original typeface, hidden shapes, or clean brand curves.
Look for the original SVG, AI, EPS, or vector PDF before tracing a raster. If no master exists, use the largest, least-compressed image. Crop interface chrome and empty margins, remove an unwanted background, and increase edge contrast without erasing narrow gaps.
For logo lettering, compare the source against the vector at several sizes. If the mark must be exact, obtain the brand master or redraw it. A smooth curve can still be the wrong curve.
Understand what the SVG stores
SVG stores graphical objects in an XML document. Its path element can describe lines, curves, and closed subpaths. A cutter-oriented file is useful when those paths express the boundaries you actually want.
That leads to four separate checks:
- Shape fidelity: Does the contour resemble the intended art?
- Path structure: Is it open or closed where required?
- Object organization: Are holes, overlaps, and colors represented deliberately?
- Physical size: Does the document import at the intended dimensions?
A file can pass one check and fail another. Clean-looking artwork may contain doubled paths. A genuine vector may be too complex to edit comfortably. A correct outline may import at an unexpected size because applications interpret document units differently.
Convert the image into editable shapes
For suitable artwork, you can prepare a clean cut-ready SVG with PerfectVector. The same raster-to-vector stage used for other desktop cutters applies here: upload the flat image, convert it into filled paths, and download the SVG for inspection.
Treat the download as a starting file. PerfectVector rebuilds visible artwork as vector geometry; it does not create a Leonardo project, assign Siser material settings, choose a blade, mirror heat-transfer vinyl, or validate a physical cut.
When you open the SVG in a vector editor, begin with the background. A white rectangle that looks like empty canvas is still a filled shape and may become an unwanted cut region. Delete it when it is not part of the design.
Then ungroup the artwork enough to inspect individual color regions. Keep a clean source copy before making destructive path operations so you can compare or restart.
Inspect path structure, not just appearance
Switch to outline or wireframe view if your editor provides one. Select individual objects and use the node tool.
Close intended cut contours
A filled shape normally needs a deliberate boundary. Join endpoints that are meant to meet. Do not close decorative strokes merely to remove a warning; decide whether each line should become a filled outline, a centerline for another process, or be removed.
Preserve holes as holes
The inside of an “O,” the gap in a handle, or negative space in a logo should not become a separate filled piece. Use compound paths or the destination's accepted structure, then test the exported SVG. If the hole fills in after import, inspect winding, compound-path construction, and overlapping objects.
Remove doubled contours
Traces sometimes create an inner and outer boundary around a thick printed line. Cutting both produces a narrow strip rather than the single contour you expected. Decide whether the source line should become an outlined band or one simplified cut boundary.
Reduce unnecessary nodes
A path that follows every pixel bump can contain hundreds of points. Simplify it until curves are easier to edit, but compare the result to the source. Corners, small notches, and intentional hand-drawn character can disappear when simplification is too aggressive.
The Siser introduction highlights node editing within Leonardo Design Studio, so some repair is possible after import. Major reconstruction is still easier to control before the file reaches the cutting workspace.
Organize colors around the material job
A multi-color SVG is not automatically a ready-to-layer project. Each filled region represents artwork geometry; you decide how that geometry maps to vinyl or another material.
Before import:
- merge same-color shapes only when doing so improves selection and does not destroy holes;
- remove invisible or accidental colors created by antialiasing;
- decide whether overlapping shapes should remain stacked or be subtracted;
- add intentional registration marks only if they fit your assembly method;
- name layers in your editable master, while recognizing that destination imports may not preserve every authoring-app convention.
A JPEG edge often contains several nearly identical colors. If those become separate path groups, a simple three-color logo can turn into dozens of fragments. Reduce colors during conversion or consolidate them carefully afterward.
For heat-transfer vinyl, do not bake mirroring into the only master copy. Keep the artwork readable in the source SVG and apply the appropriate mirror step in the production workflow after you confirm the material and orientation.
Establish size before and after import
Choose one known final dimension, such as the overall width of the chest graphic or the height of a decal. Set it in your vector editor with aspect ratio locked. Record that number in the job notes.
Also keep the SVG's viewBox tight around the artwork. Large empty space can make the design appear tiny on the canvas even when the paths themselves are correct.
After import into Leonardo:
- select the complete design;
- read the displayed width and height;
- compare them with the recorded dimension;
- correct the scale uniformly if needed;
- verify one small feature, such as a letter counter or gap, at the final physical size.
The broader SVG imports at the wrong size guide explains why a viewBox, document units, and destination mapping need separate checks.
Import into Leonardo Design Studio
Siser's official introduction describes the menu route as File → Open → Import File and lists SVG, PNG, and JPG among the supported imports. It also positions Leonardo Design Studio as the workspace for Siser Romeo and Juliet cutters. The official Siser store overview reinforces that cutter-specific role.
Once the SVG is present, inspect rather than assuming the import is correct:
- Are all expected shapes visible?
- Did any hole fill in?
- Are color groups sensible?
- Are there extra background or clipping shapes?
- Does the displayed size match the number you recorded?
- Does moving one component reveal an accidental duplicate underneath?
- Does the cut preview or object view match the boundaries you expect?
This article deliberately avoids export-tier and subscription claims. Those can change, and they are not needed to prepare an importable SVG.
Set up the cut in the destination workflow
Vector geometry is only one input to a physical cut. In Leonardo, finish the machine-side decisions using current Siser guidance and your own material tests:
- choose the actual machine and connected workspace;
- place the design on the mat or roll layout;
- mirror when the material and transfer method require it;
- choose the material profile as a starting point;
- confirm blade condition, exposure, pressure, and speed;
- check that grouped colors match the layers you plan to load;
- test a small representative section.
Do not use settings copied blindly from a different material, finish, machine, blade, or batch. A test square with only straight edges is not enough for a design whose risk lies in tiny counters and tight curves. Include the smallest important detail in the test.
Diagnose common import and cut problems
| What you see | Likely cause | Fix |
|---|---|---|
| White rectangle around the design | Background was traced as a filled shape | Delete it before re-export |
| One color became many fragments | JPEG antialiasing or too many trace colors | Reduce and consolidate color regions |
| Letter holes are filled | Compound-path or overlap problem | Rebuild negative space and test the exported SVG |
| Design imports too small or too large | Document-unit or canvas mapping difference | Apply the recorded dimension uniformly |
| Cutter follows two nearby lines | Thick raster line became inner and outer paths | Choose a band or rebuild one intended contour |
| Curves look jagged | Low-resolution edge or excessive nodes | Use a cleaner source and simplify selectively |
| Small details lift during weeding | Features are too delicate for the material or settings | Enlarge, simplify, adjust the cut, and retest |
| Photograph becomes hundreds of shapes | Wrong choice of vector workflow | Keep it raster for print-then-cut |
Keep a reusable master
Save an editable master SVG before destination-specific setup. Keep its shapes organized, its size recorded, and its orientation readable. Store the original raster beside it for comparison.
For each physical job, save a separate production copy with notes about material, dimensions, mirroring, machine, and test result. That separation lets you reuse the same clean geometry without accidentally inheriting settings from a previous vinyl or cardstock job.
FAQ
Can Siser Leonardo import SVG files? Siser's official introduction lists SVG as a supported import format, along with PNG and JPG. Import the file, then check size, paths, negative spaces, and color groups before cutting.
Should I convert a PNG to SVG for Leonardo? Convert it when you need editable, scalable cut shapes and the source has clear graphic boundaries. Keep the PNG for a print-then-cut image when photographic tones should remain pixels.
Why does my SVG have a box around it in Leonardo? The source background may have been converted into a filled rectangle. Open the SVG in a vector editor, delete the unwanted background shape, and export again.
Why are there two cut lines around my drawing? A thick raster line may have been traced as a filled band with inner and outer edges. Decide whether you want that band or one center contour, then rebuild the geometry accordingly.
Does PerfectVector choose Siser cut settings? No. PerfectVector reconstructs suitable raster artwork as vector paths. Choose the machine, material, mirroring, blade, pressure, speed, and test-cut workflow in Leonardo using current Siser guidance.
Sources
- Siser North America — Intro to Leonardo Design Studio — official import formats, import route, compatible cutter context, and node-editing overview.
- Siser Store — Leonardo Design Studio — official product overview and Romeo/Juliet design-workspace context.
- W3C — SVG Paths — path, curve, subpath, and closure behavior in the SVG standard.
Ready to clean up a flat logo, badge, or illustration? Prepare a clean cut-ready SVG, inspect its paths and size, then import it into Leonardo for material setup and a representative test cut.
More from the blog
Image to SVG for Brother ScanNCut: Clean Cut Paths
Convert an image to SVG for Brother ScanNCut. Compare CanvasWorkspace tracing with a clean external SVG, then check colors, paths, size, FCM, and preview.

Convert an Image to SVG With Clean CNC Cut Paths
A CNC follows vector paths, not pixels, so your design has to become a clean SVG or DXF first. Here's how to convert an image into CAM-ready, closed-path vectors.