Prepare Vector Artwork for Pad Printing: A Vendor Handoff
Prepare vendor-ready vector artwork for pad printing: confirm scale and colors, outline fonts, separate the mark, send a proof, and avoid raster traps.
On this page
- Why pad printing benefits from vector artwork
- Vendor requirements differ, so call first
- Build the production artwork in six steps
- 1. Confirm the physical target
- 2. Recover or reconstruct clean paths
- 3. Reduce the design to the production colors
- 4. Outline fonts in the delivery copy
- 5. Check details at final size
- 6. Package the handoff and proof
- What a vectorizer can and cannot finish
- Common handoff failures
- FAQ
- Sources
To prepare vector artwork for pad printing, ask the printer for its specification first, build the mark as editable paths at the final print size, outline fonts in a delivery copy, separate each requested color, and send an appearance proof with the production file.
Do not assume every pad-printing vendor wants the same format. One current shop prefers a vector PDF and rejects TIFF, JPEG, and BMP, while another accepts certain bitmap files for its cassette workflow. The vendor's instructions control the handoff.
Send this before artwork production
Please confirm the final image size, number of print colors, color references, accepted vector format, font treatment, minimum printable line and gap, required template, and whether you need one file per color or will make the separations.
A practical delivery packet
- Editable vector artwork at the vendor's requested scale.
- Text converted to outlines in the delivery copy, unless the vendor asks for live type plus fonts.
- Separate, clearly identified color shapes or files according to the shop's process.
- A PDF or PNG appearance proof showing the intended composite result.
- Final dimensions, substrate or part reference, color callouts, version, and contact details.
- Any vendor template left intact, with artwork placed exactly where requested.
Why pad printing benefits from vector artwork
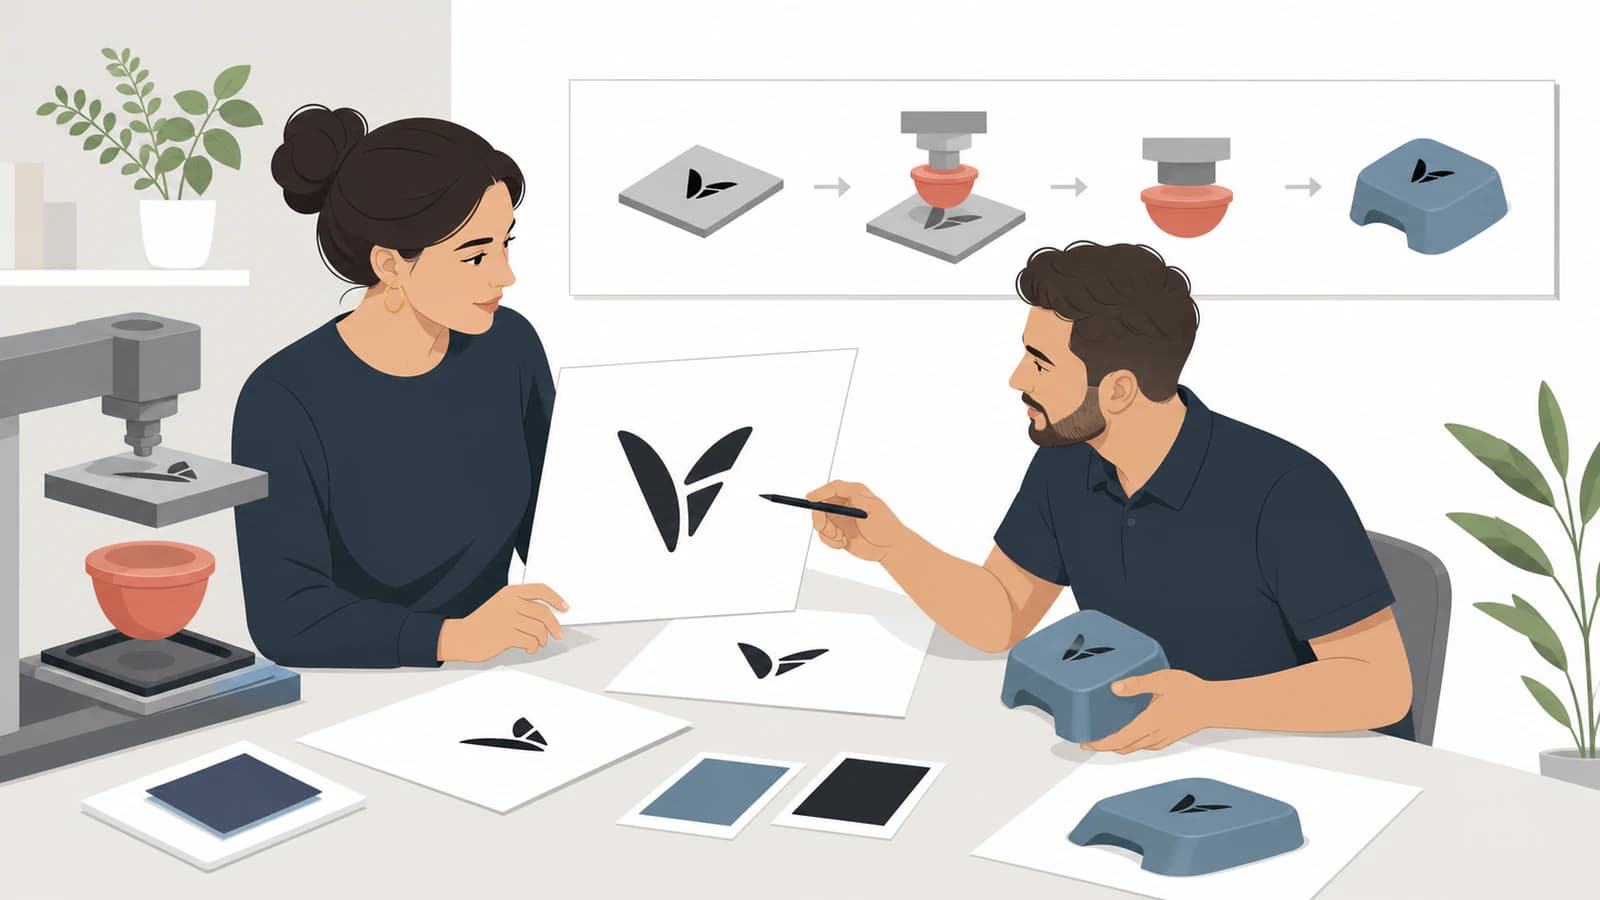
Pad printing transfers a two-dimensional image to a three-dimensional object. Inkcups' current Pad Printing 101 guide describes the basic chain: an etched plate holds the image, an ink cup fills that etch, and a silicone pad picks up and transfers the ink to the part.
The artwork therefore feeds a production process, not just a desktop printer. Clean vector paths give the vendor inspectable contours for plate making, scaling, color separation, and correction. A small JPEG gives it pixels, compression artifacts, and a fixed resolution.
Vector does not automatically mean printable. A file can still contain hairlines, tiny gaps, hundreds of unnecessary nodes, live fonts, transparency, or effects that do not suit the job.
Vendor requirements differ, so call first
Pad Printing Technology's current Artwork Design page asks customers to call before designing. That shop prefers a vector PDF for proofing, requests fonts or outlined text, asks for artwork at 100% scale in black and white, and wants color specified separately. It says TIFF, JPEG, and BMP are not acceptable for its pad-printing workflow.
Duplication.ca gives different instructions for its cassette service. Its vector-artwork note recommends paths or outlined Illustrator text and vector PDF, but also lists PSD, PDF, TIFF, or PNG for bitmap submissions using the proper cassette template.
Neither vendor is contradicting the other. They run different workflows. Treat both as examples of why a generic internet checklist cannot replace the quote, template, and art specification for your job.
Ask before you redraw anything, especially when:
- the print goes on a curved, recessed, textured, or flexible part;
- the mark uses more than one color;
- registration between colors is visually critical;
- the vendor supplies a dieline or part template;
- the artwork includes fine text, reversals, screens, or halftones;
- the color must match a named brand reference;
- the print location or orientation is not obvious from the artwork alone.
Build the production artwork in six steps
1. Confirm the physical target
Record the final width and height of the printed image, not just the size of the product. Get the vendor's template when one exists. Ask whether the artwork should be supplied at actual size and where its origin or registration point belongs.
Do not enlarge the logo until it “looks about right” on a screen. Pad printing is a physical process, so the handoff must carry a physical measurement.
2. Recover or reconstruct clean paths
Find the original AI, EPS, SVG, or genuine vector PDF first. Open it and select individual shapes. If the file contains editable paths, use that master rather than tracing a website PNG.
When only a raster remains, a logo vectorization workflow is reasonable for flat logos, symbols, line art, and limited-color badges with clear edges. Redraw instead when the source is tiny, blurred, photographic, or brand-critical enough that a close trace is not acceptable.
Inspect the result for:
- smooth intended curves with a manageable node count;
- sharp corners that stayed sharp;
- open counters inside letters and symbols;
- no background rectangle, specks, or compression halos;
- closed filled regions;
- separate shapes for each intended color.
3. Reduce the design to the production colors
Do not send dozens of near-duplicate colors from an automatic trace. Match the artwork to the color plan the vendor approved.
Keep one editable composite master. Then prepare delivery layers or separate files exactly as requested. Use solid color callouts, not a screen appearance that leaves the printer guessing which ink you meant.
Avoid assigning your own plate order or trapping unless the vendor asks you to. The required adjustments depend on the part, pad, press, ink, and registration plan.
4. Outline fonts in the delivery copy
Keep live, editable text in your master file. In a duplicate made for production, convert the type to outlines when the printer asks for outlined text. That prevents a missing font from substituting another face or changing spacing.
Outlining does not recover the identity of a font from a JPEG. If the only source is flattened artwork, either identify and reset the type or reconstruct the visible letter shapes with the owner's approval.
Adobe's Illustrator font guidance covers font handling in Illustrator. The vendor's rule still comes first: some shops accept supplied fonts, some want outlines, and some want both a master and a flattened proof.
5. Check details at final size
Print a paper proof at 100% scale when the artwork is small. Look at the actual size rather than a 1200% zoom.
Ask the vendor to review:
- the thinnest positive line;
- the smallest negative gap;
- tiny letter counters;
- sharp inside corners;
- registration between colors;
- distortion or reach on the real part geometry;
- the selected color references and expected substrate interaction.
There is no responsible universal minimum in this article. The acceptable detail depends on the vendor's plate, equipment, ink, pad, part, and quality target.
6. Package the handoff and proof
Name files clearly and keep the version consistent across the production file and proof. Include:
- the requested vector file;
- separate color files or layers if required;
- a composite appearance proof;
- final dimensions and placement reference;
- color specifications supplied or accepted by the vendor;
- a note stating that text is outlined;
- the quote, order, or part identifier.
Ask the vendor to return a production proof for approval. Approve size, placement, spelling, color plan, and orientation before plate making.
What a vectorizer can and cannot finish
PerfectVector's image-to-Illustrator converter can reconstruct supported raster artwork as filled RGB vector paths and package it in an Illustrator-compatible AI handoff. That is useful when a printer needs editable geometry and the original logo master is gone.
The current output is deliberately narrower than a native prepress document. It does not recreate original live type, native layers, CMYK, named spot colors, print separations, vendor trapping, or the distortion compensation a particular three-dimensional part may need.
Use it as a geometry-recovery step:
- Upload the cleanest source available.
- Compare the preview with the original.
- Inspect paths and merge accidental color fragments.
- Download only if the shapes are a useful reconstruction.
- Finish the vendor-specific color and production setup in the requested application or with the printer.
If the shop accepts SVG, a clean SVG master may be the simplest editable source. If it requests a native Illustrator document with named swatches and layers, use the print-shop AI-file handoff guide, then have a designer or the vendor finish the recovered paths in Illustrator.
Common handoff failures
| Failure | Why it causes trouble | Better handoff |
|---|---|---|
| JPEG placed inside an AI file | The artwork is still pixels | Reconstruct or redraw real paths |
| Unoutlined text with no font | Type can substitute or reflow | Outline a delivery copy or package fonts as requested |
| RGB composite with no color plan | Vendor must guess separations and ink references | Supply approved colors and requested separations |
| Artwork only at a large screen zoom | Tiny details may fail at real size | Review a 100% proof and vendor limits |
| No appearance proof | Separate files may be assembled incorrectly | Include a composite reference |
| Generic PDF with no job information | Scale, part, orientation, and revision are ambiguous | Add dimensions, part reference, version, and contact details |
FAQ
Does pad-printing artwork need to be vector? Often, but the vendor decides. Vector paths are useful for scaling, plate preparation, and color separation. Some vendors also accept specified bitmap formats for particular workflows.
What vector format should I send for pad printing? Ask the printer. Current vendors commonly mention vector PDF, while a shop may also accept AI, EPS, or another format. Follow its template and specification rather than guessing.
Should I convert fonts to outlines for pad printing? Do so in a delivery copy when the vendor requests outlined text. Keep an editable master with live text for future corrections.
How should I prepare multiple colors for pad printing? Confirm the number of colors and ask whether the shop wants separate files, layers, or a composite with named callouts. Do not invent trapping or plate order without the printer's direction.
Can I vectorize a low-resolution logo for pad printing? You can try when the mark is simple and its intended edges are still visible. If blur or compression hides the original geometry, redraw the logo instead and obtain approval before production.
Sources
- Inkcups — Pad Printing 101 — Current overview of the plate, ink cup, silicone pad, and image-transfer process.
- Pad Printing Technology — Artwork Design — One current vendor's call-first policy, vector PDF preference, scale, font, and color instructions.
- Duplication.ca — Get Higher-Resolution Pad Print Using Vector Artwork — A second vendor's cassette-specific vector, outline, PDF, bitmap, and template guidance.
- Adobe — Fonts in Illustrator — Current Illustrator font handling and outline context.
- PerfectVector — Image to Adobe Illustrator — Current raster-to-vector AI handoff workflow, output profile, and product limitations.
If the vendor needs editable geometry and the only master left is a clean raster logo, reconstruct an Illustrator-compatible vector handoff, inspect the paths, and let the printer's specification govern every prepress decision that follows.
More from the blog
Logo Clear Space: Calculate and Preserve the Margin
Choose a clear-space unit for your logo, calculate the full exclusion zone, and preserve it in an SVG without confusing artwork size with the padded canvas.

Woven Label Artwork: Keep a Logo Clear at Small Sizes
Prepare a logo for a woven clothing label: simplify detail at its intended size, separate folds and sewing space, and export the files your label maker requests.